This site uses affiliate links, meaning that if you make a purchase through our links, we may earn an affiliate commission.
Situated in the Rocky Mountains, Glacier National Park draws photographers worldwide. From rugged peaks to pristine meadows and glacial lakes, the park is a haven for stunning photos. Explore with us as we pinpoint the best photography locations in Glacier, perfect for both seasoned professionals and eager amateurs.
- 1. Glacier National Park At-A-Glance
- 2. 9 Best Photography Locations in Glacier National Park
-
- 2.1. Avalanche Lake - Famous Photo Spot for Stunning Mountain Backdrop in Glacier
- 2.2. St. Mary Falls and Virginia Falls - Best Photo Locations for Capturing Breathtaking Cascades
- 2.3. Wild Goose Island Lookout - Iconic Photo Spot Offering a Panorama of Glacier National Park
- 2.4. Grinnell Glacier Viewpoint - Best Photo Location to Capture Glacial Grandeur
- 2.5. Swiftcurrent Lake - Famous Photo Spot for Tranquil Mountain Reflections
- 2.6. Hidden Lake Overlook - Best Photo Location for Alpine Scenery and Stunning Reflections
- 2.7. Cracker Lake - Famous Photo Spot for Turquoise Waters and Majestic Mountain Backdrop
- 2.8. Iceberg Lake
- 2.9. Ptarmigan Tunnel - Iconic Rocky Mountain Passage that Leads to Panoramic Vistas
- 3. Intrepid Scout's Tips on Best Photography Locations in Glacier National Park
Glacier National Park At-A-Glance
Before diving into where to stay in Glacier National Park, here are a few things you need to know about the park:
- Glacier National Park Is Divided Into 5 Main Regions:
1. Lake McDonald Valley Region – it is situated on the western side of the park along beautiful Lake McDonald.
2. St. Mary Valley and Logan Pass Region – St. Mary Region is located east of Lake McDonald Valley and Logan Pass is the highest point reachable by car on the Going-to-the-Sun Road.
3. Two Medicine Valley Region – it is situated on the southeastern side of Glacier National Park and can be reached by exiting the park on the east side and driving south on Highway 89 for about an hour and then re-entering the park.
4. Many Glacier Valley Region – it is located on the eastern side of the park. You will need to exit the park on the east side and then continue north on Highway 89 for about 30 minutes and then re-enter the park.
5. North Fork and Goat Haunt Region – this area is located on the northwestern side of Glacier National Park. North Fork is only accessible by unpaved roads and Goat Haunt requires backcountry hiking access.
- Best Time to Visit Glacier National Park
Hands down, summer is the best (and most popular) time to visit Glacier National Park. The weather is warm and all park facilities are open. However, my favorite time to visit is early to mid-September. The weather can be awesome in the fall and it is a great time to avoid the crowds and find some solitude on the trails.
- How to Get to Glacier National Park
Glacier National Park is located in northwestern Montana and the closest airport to Glacier National Park is Glacier Park International Airport (FCA). It is located in Kalispell which is 12 miles from the town of Whitefish and 30 miles from the West Entrance to Glacier National Park.
- How to Get Around in Glacier National Park
Driving your car or renting a car is the best option to get around Glacier National Park. This option is the most convenient and gives you the most flexibility.
Unfortunately, if you are visiting during the summer months, finding a parking spot can be very challenging. My recommendation is to start your day early and have a lot of patience while waiting for a spot to open.
Glacier National Park offers West and East Shuttle Service that operates on the Going-to-the-Sun Road. There are some pros and cons to using the shuttle. From my personal experience, the shuttle system is not very efficient.
- Glacier National Park has a Reservation System to access the Going-to-the-Sun Road
Starting in May through September, from hours 6 am to 3 pm MDT, you are required to have a reservation ticket to access the Going-to-the-Sun Road. Reserve your Entrance Pass here
- Intrepid Scout’s Tip
It costs $35 to enter the park. The entrance pass is good for 7 consecutive days. If you are visiting several national parks then make sure to get America the Beautiful National Park Pass. This $80 pass is valid for 12 months and gets you into all 400+ national park sites!
9 Best Photography Locations in Glacier National Park
Avalanche Lake - Famous Photo Spot for Stunning Mountain Backdrop in Glacier
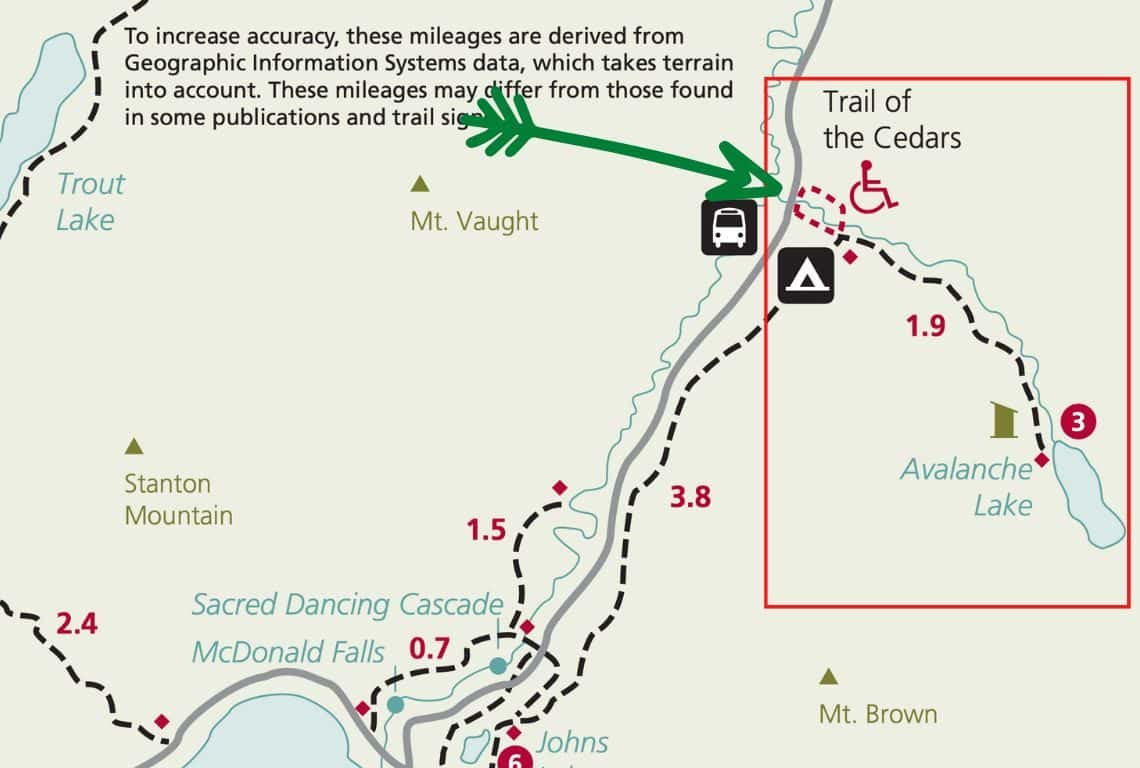
Avalanche Lake Trail Map / Image Credit: NPS / Best Photography Locations in Glacier National Park
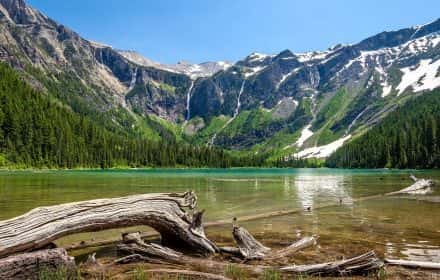
Avalanche Lake sits in a bowl-shaped canyon surrounded by towering cliffs of Bearhat Mountain standing at 8,694 feet, Little Matterhorn at 7,886 feet, and Mount Brown at 8,569 feet, making it an ideal photography location.
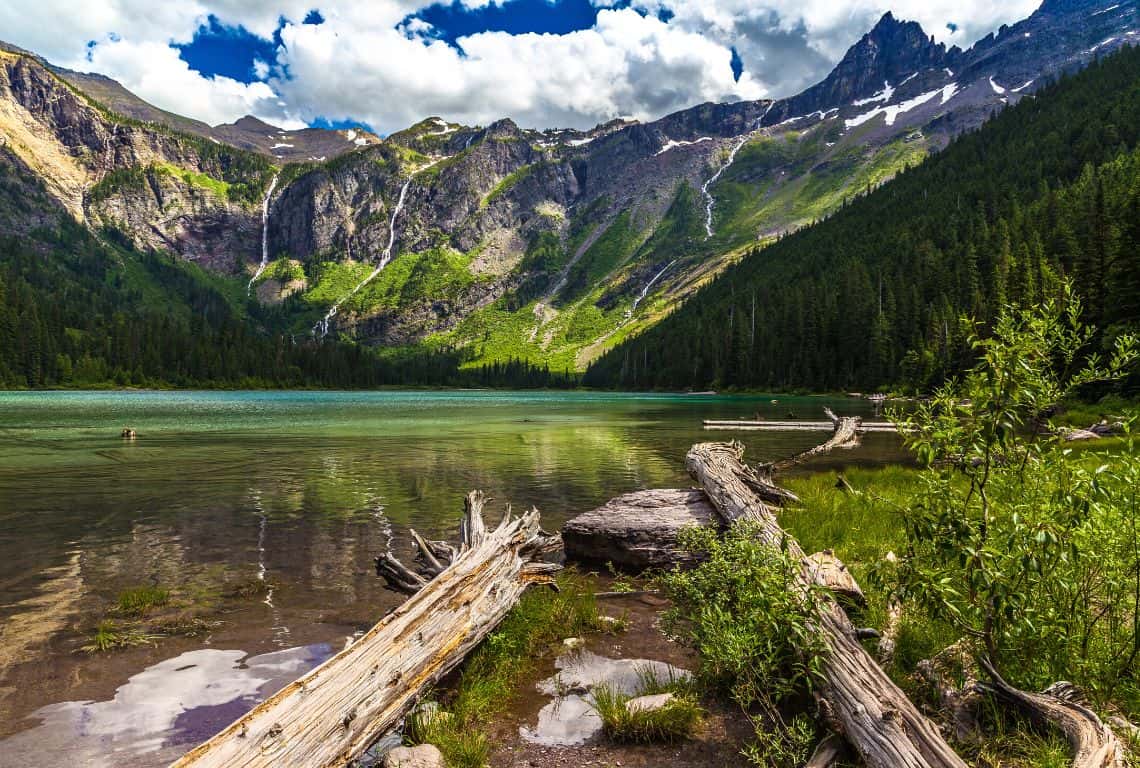
Avalanche Lake / Best Photography Locations in Glacier National Park
With crystal-clear waters reflecting majestic peaks and vibrant foliage, Avalanche Lake offers a stunning backdrop for landscape photography.
In late spring or early summer, you will be treated to remarkable views of numerous waterfalls. These cascading falls are formed by the melting snow and ice of Sperry Glacier, tumbling hundreds of feet down Bearhat and Little Matterhorn Mountains.
INTTEPID’S PRO TIPS:
- When photographing Avalanche Lake, consider visiting during the early morning or late afternoon when the light is soft and warm casting a nice glow over the scene. The calmness of the lake often creates mirror-like reflections, amplifying the beauty of the landscape.
- Utilize a polarizing filter to enhance the colors and reduce glare, allowing the vibrant hues of the foliage and mountains to truly shine.
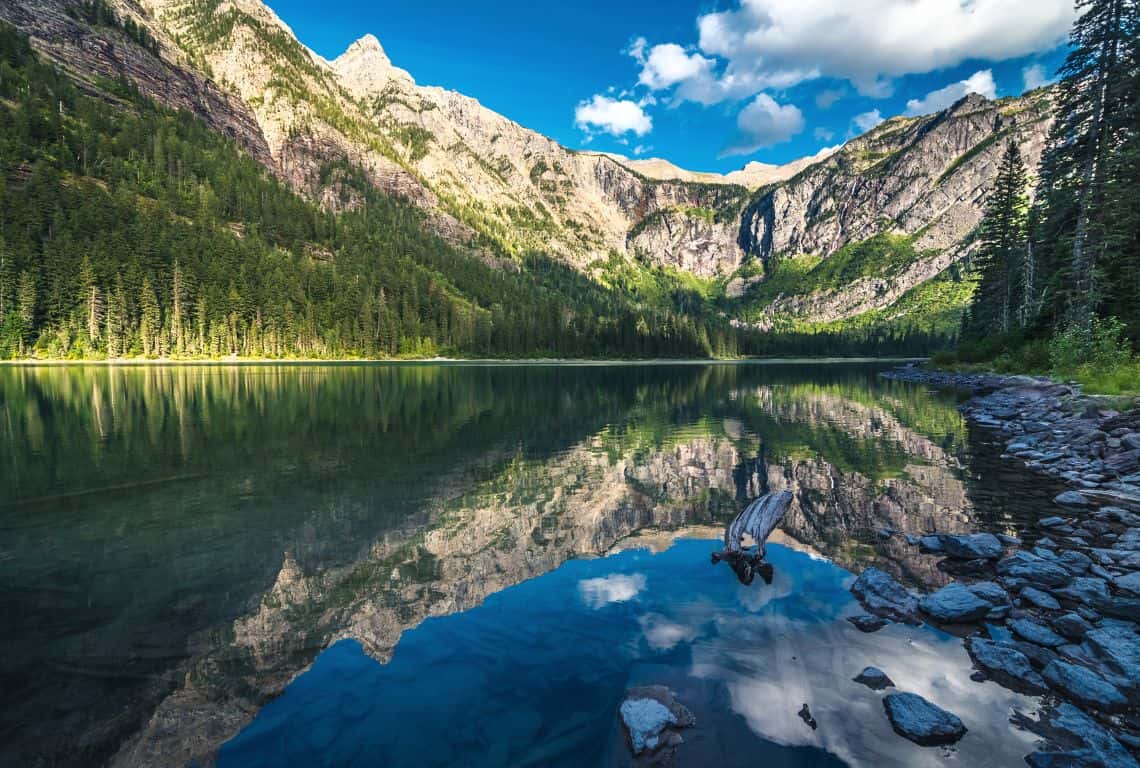
Avalanche Lake in Summer / Best Photography Locations in Glacier National Park
- To capture a unique perspective, explore the lakeshore and experiment with different compositions.
- Look for interesting foreground elements such as fallen logs, rocks, or wildflowers to add depth and visual interest to your photographs.
- Consider using a wide-angle lens to capture the surrounding peaks and convey the scale of the landscape.
- Alternatively, a telephoto lens can help you isolate specific details or capture distant waterfalls cascading down the cliffs.
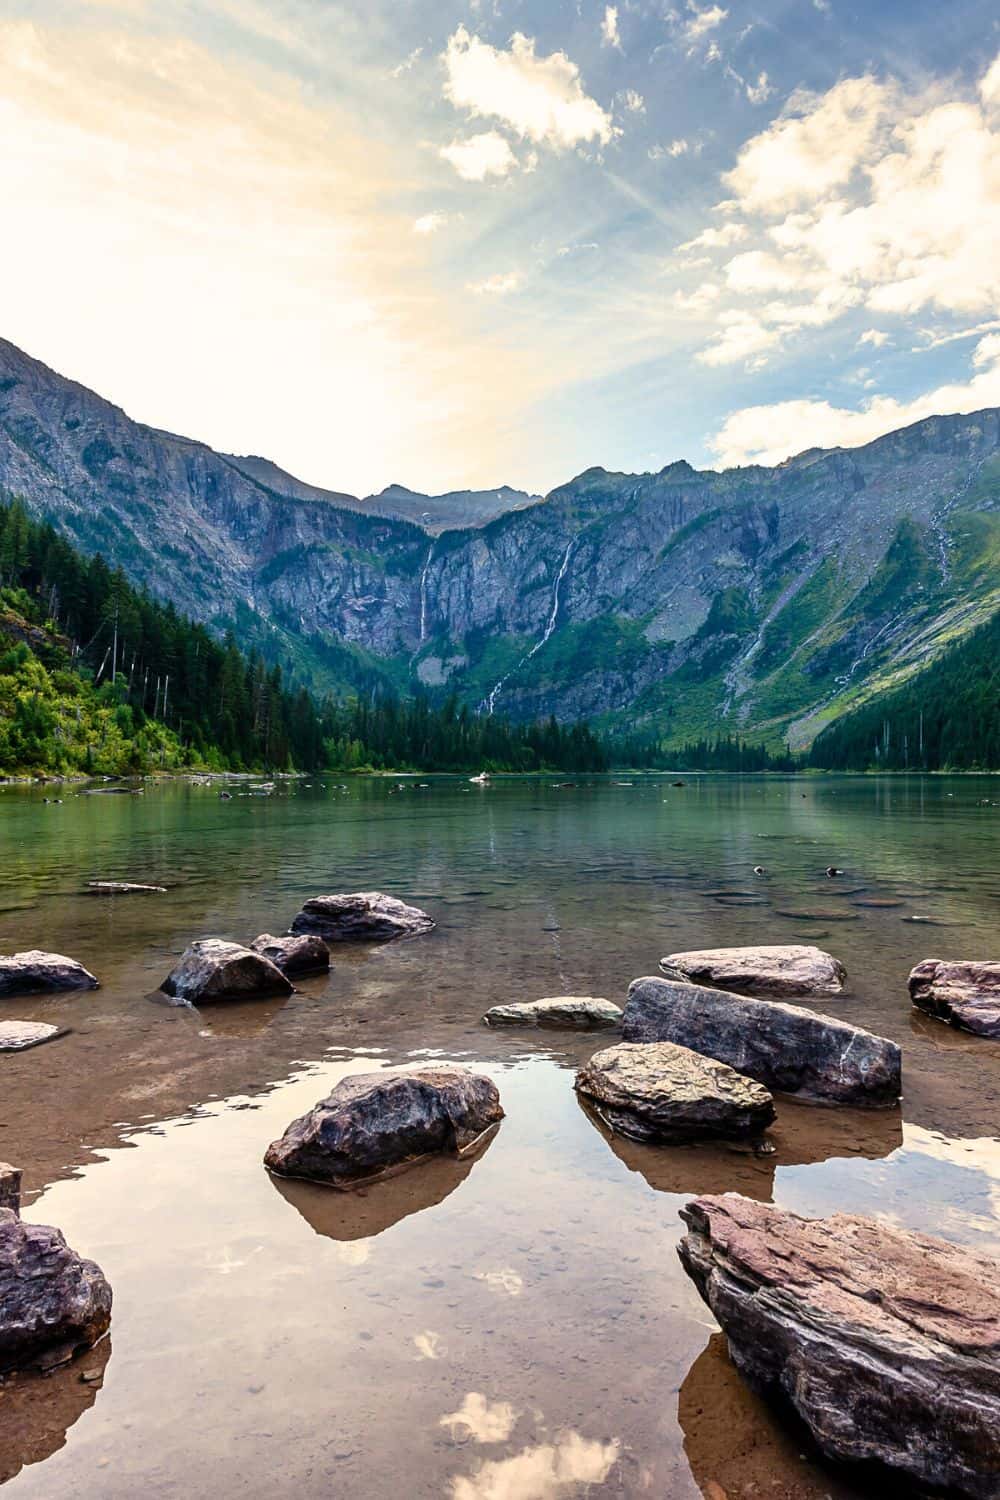
Avalanche Lake / Best Photography Locations in Glacier National Park
GOOD TO KNOW:
- To get to Avalanche Lake, you need to embark on Avalanche Lake Trail. The trailhead is located on the Going-to-the-Sun Road in the McDonald Valley Region of Glacier National Park.
- Avalanche Lake Trail is about 4.5 miles roundtrip with an elevation change of 730 feet. It is an easy/moderate type of hike perfect for almost every fitness level.
- You would start your hike with Trail of the Cedars, a delightful trail that meanders among ancient cedars, and then continue along Avalanche Creek until you reach the lake.
- There are plenty of photo opportunities along Avalanche Creek, especially once you get to Avalanche Creek Gorge. Hands down, it is a great spot to photograph as well!
St. Mary Falls and Virginia Falls - Best Photo Locations for Capturing Breathtaking Cascades
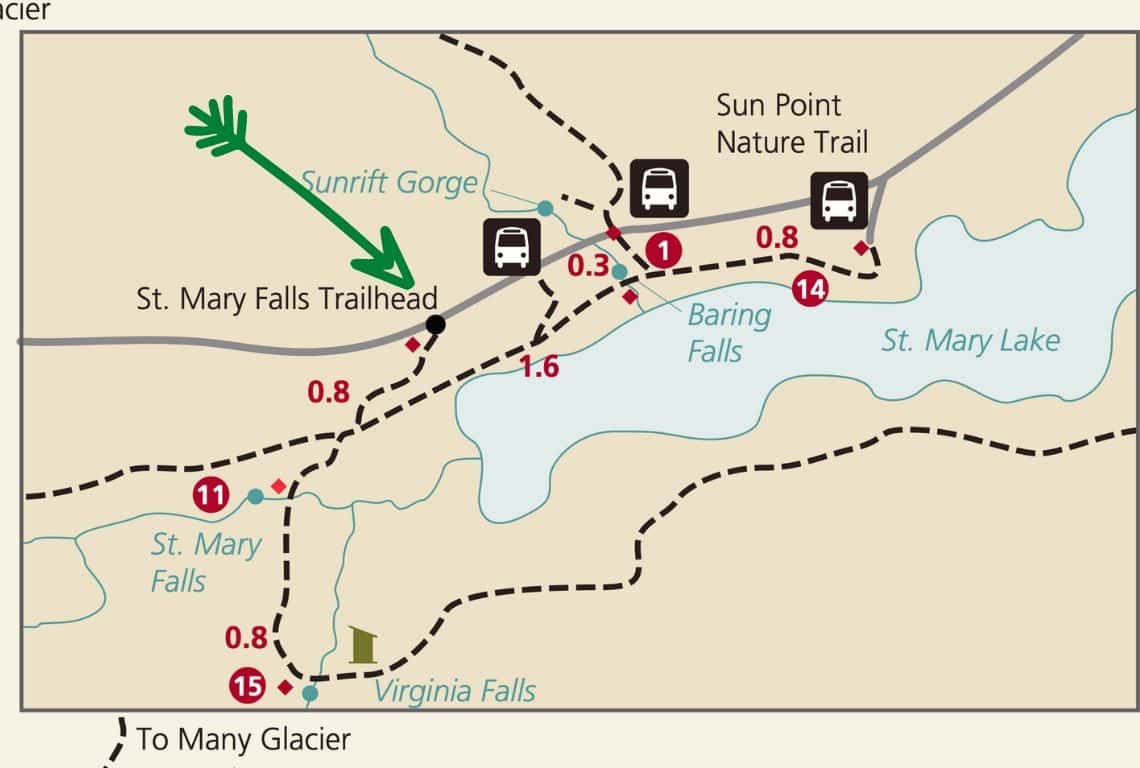
St. Mary Falls and Virginia Falls Trail Map / Image Credit: NPS / Best Photography Locations in Glacier National Park
St. Mary Falls and Virginia Falls showcase stunning cascading waterfalls that will captivate both your senses and camera lens!
Start your journey at St. Mary Falls, the first stop on the trail. Its graceful 35-foot, 3-tier plunge into a crystal-clear pool will welcome you with a symphony of rushing waters over rocks.
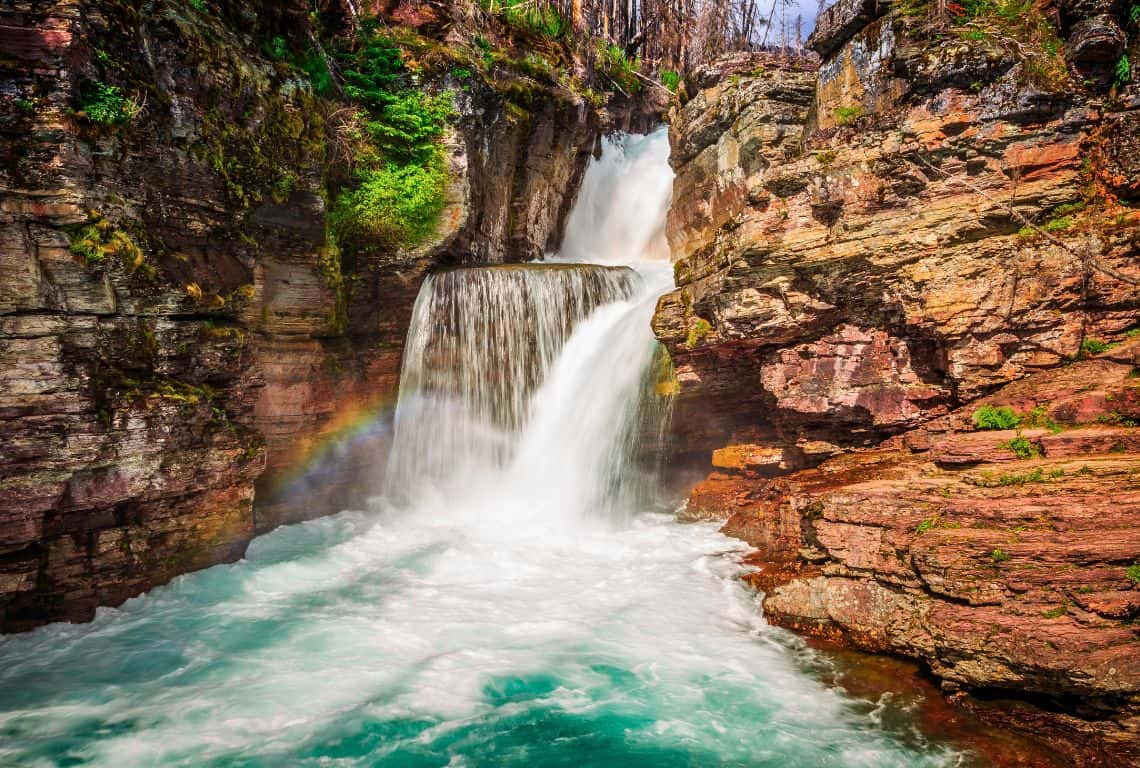
Rainbow at St Mary Falls / Best Photography Locations in Glacier National Park
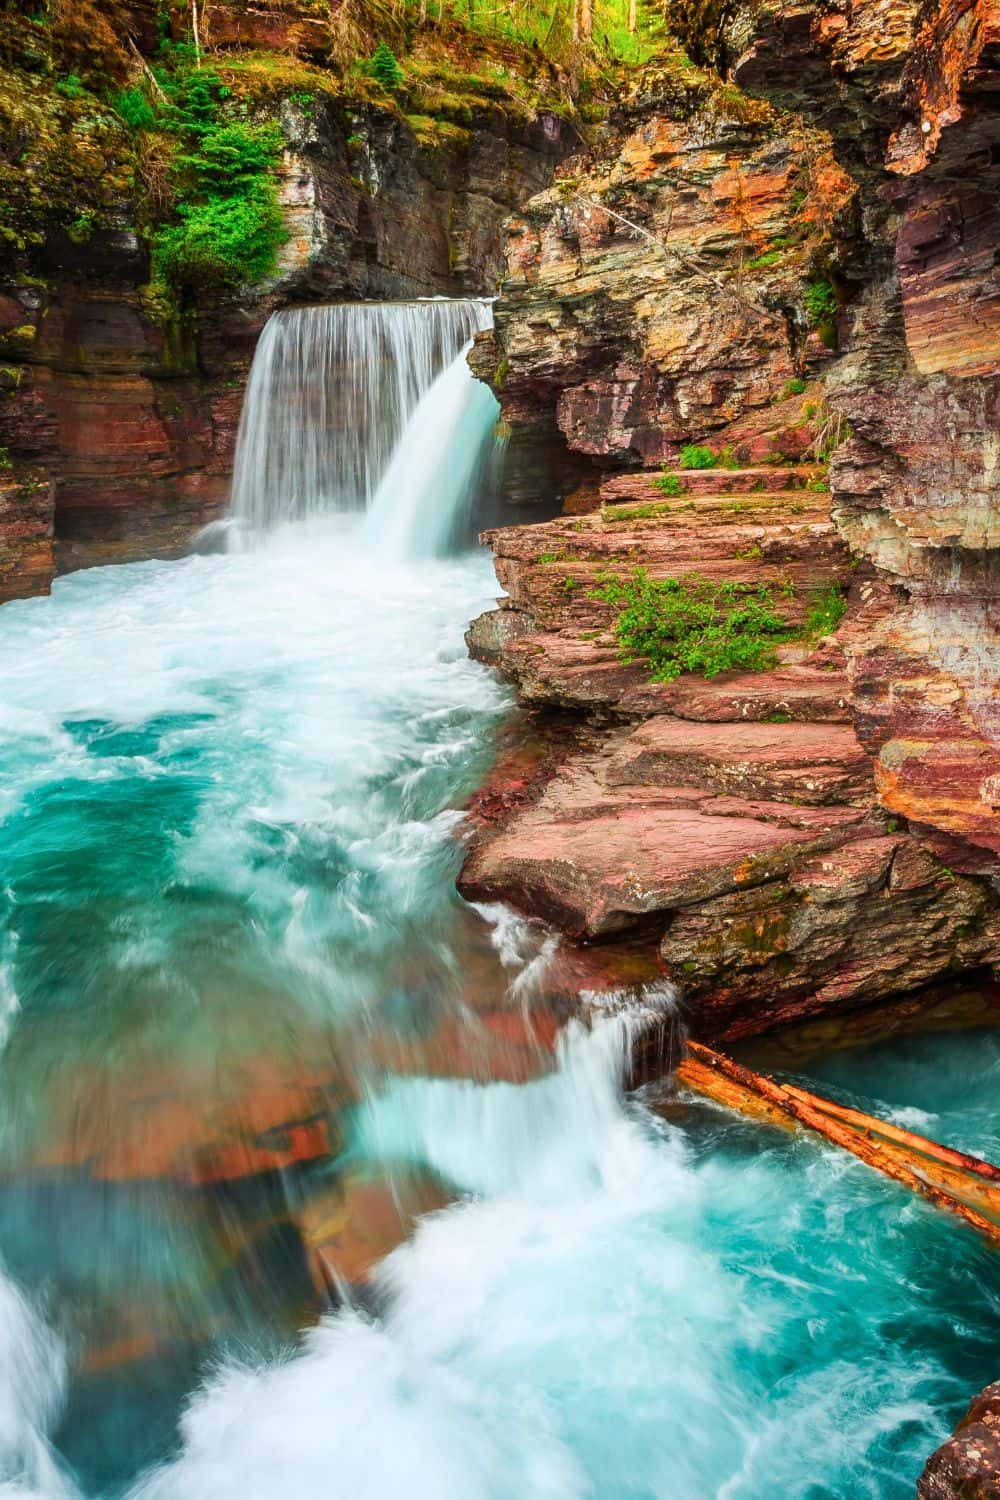
St Mary Falls / Best Photography Locations in Glacier National Park
Just a short hike away lies Virginia Falls, a grander spectacle that will reward you with its impressive 50-foot drop.
The misty spray and thundering sound add an element of drama to the scene, making it a captivating location for photography.
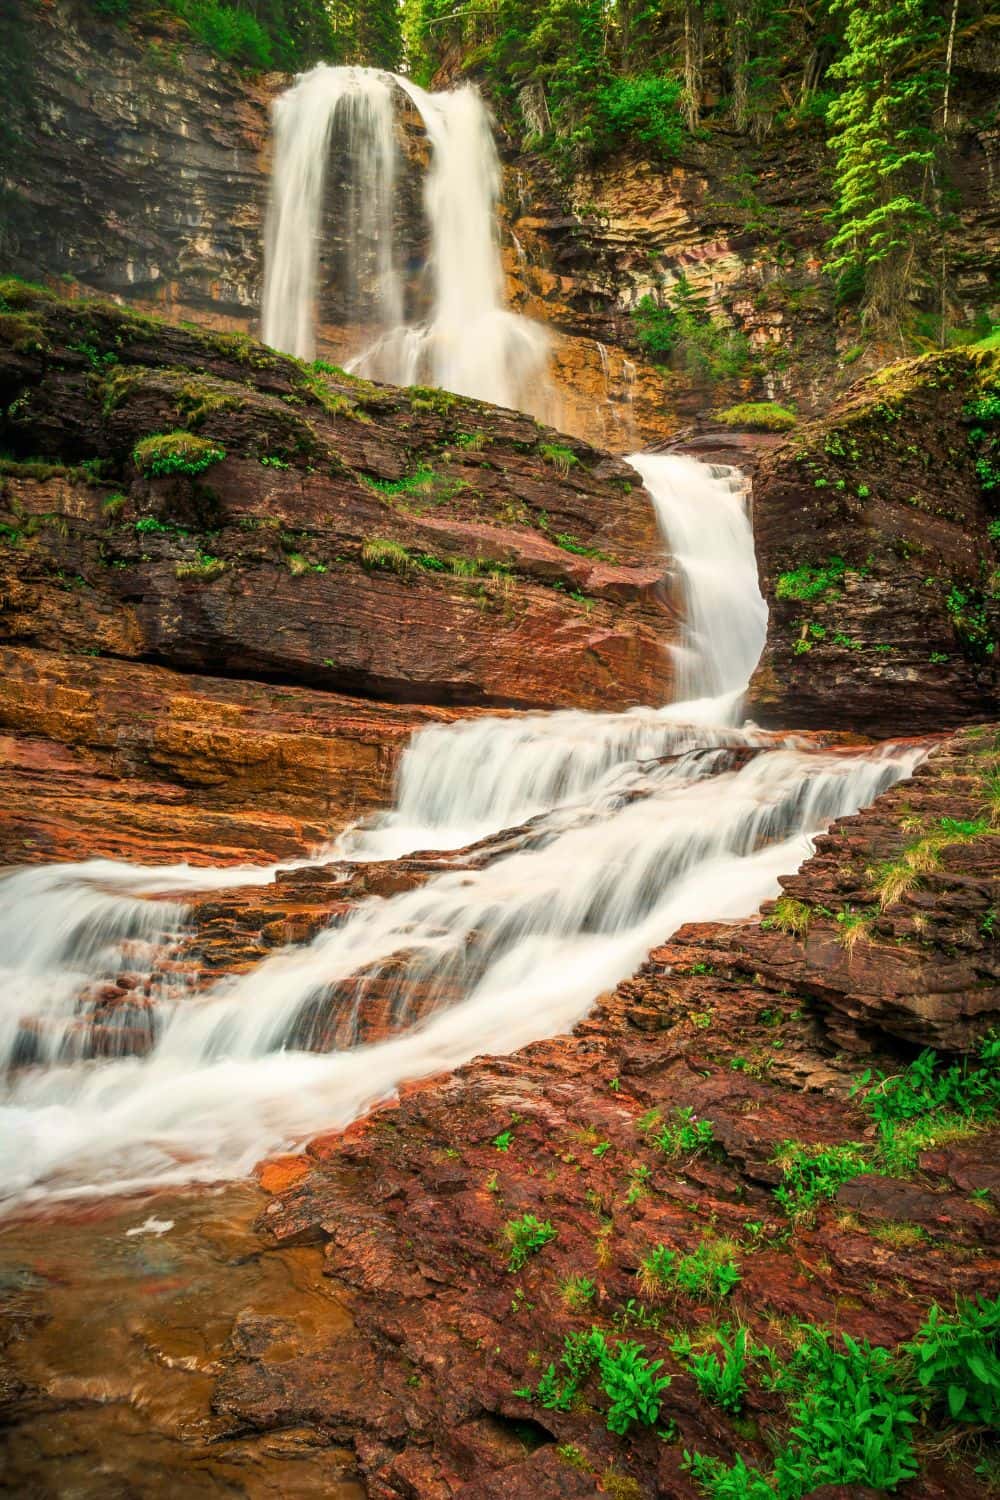
Virginia Falls / Best Photography Locations in Glacier National Park
INTREPID’S PRO TIPS:
- When photographing St. Mary Falls and Virginia Falls, timing is crucial. Visit during the early morning or late afternoon to take advantage of soft, diffused light.
- Experiment with different shutter speeds to capture the water’s movement. A slower shutter speed can create a silky, ethereal effect, while a faster shutter speed can freeze the motion, highlighting the power and energy of the falls.
- Consider using a tripod to ensure sharp images, especially when using longer exposure times. This allows you to capture the fine details of the flowing water while maintaining overall image stability.
- To add a sense of scale and context, incorporate surrounding elements such as rocks, trees, or hikers into your composition.
- Take care to protect your equipment from water droplets or spray by using lens hoods, protective filters, or waterproof camera gear.
GOOD TO KNOW:
- To get to St. Mary Falls and Virginia Falls start at St. Mary Falls Trailhead located on the Going-to-the-Sun Road in the St. Mary Valley Region of Glacier National Park.
- The hike to St. Mary Falls is super fun and easy. You will reach the falls 0.8 miles from the trailhead. The section leading to Virginia Falls is just a bit more challenging, however, it is short and you will get to the falls in no time.
Wild Goose Island Lookout - Iconic Photo Spot Offering a Panorama of Glacier National Park
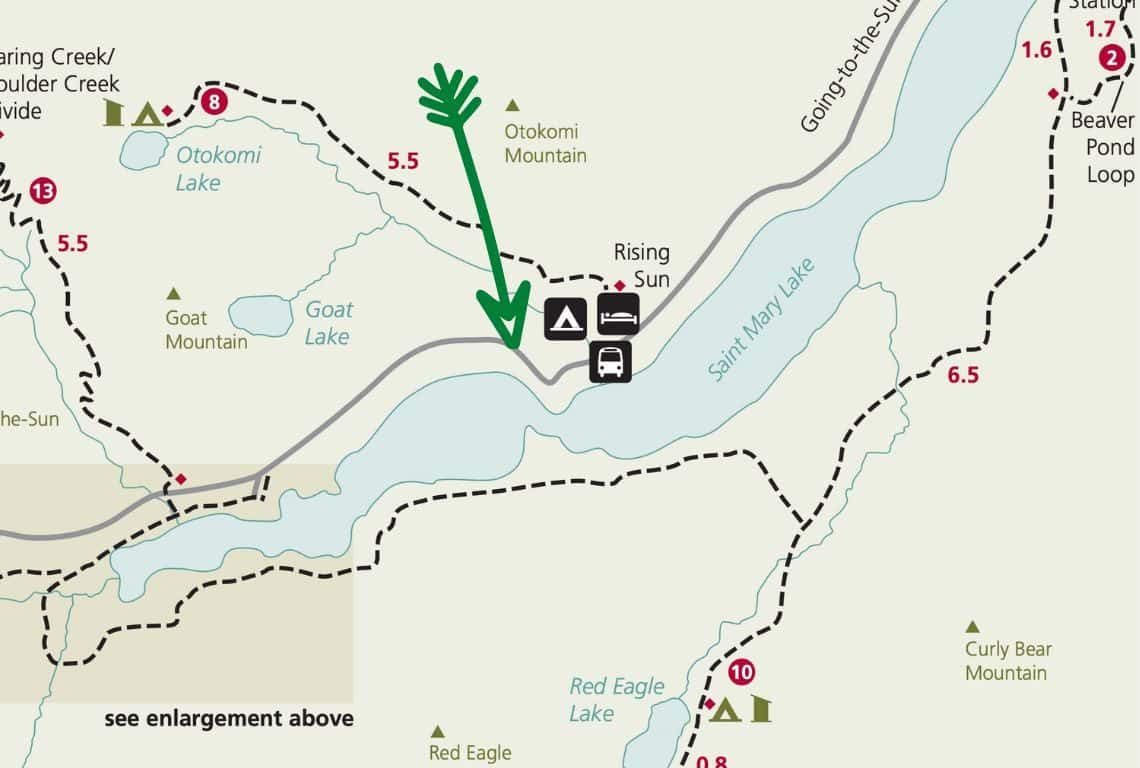
Wild Goose Island Lookout Map / Image Credit: NPS / Best Photography Locations in Glacier National Park
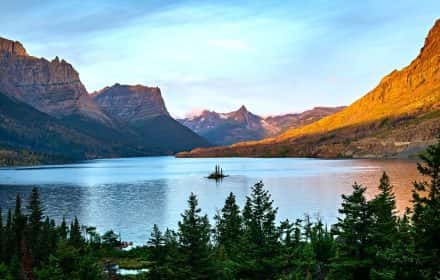
Above the clear waters of St. Mary Lake, Wild Goose Island Lookout is a visual masterpiece in Glacier National Park.
With a panoramic view straight out of a postcard, this iconic spot is perfect for capturing the breathtaking and timeless beauty of the surrounding landscape.
The lookout frames a composition that harmonizes the majestic mountains, the tranquil lake, and the solitary presence of the namesake island.
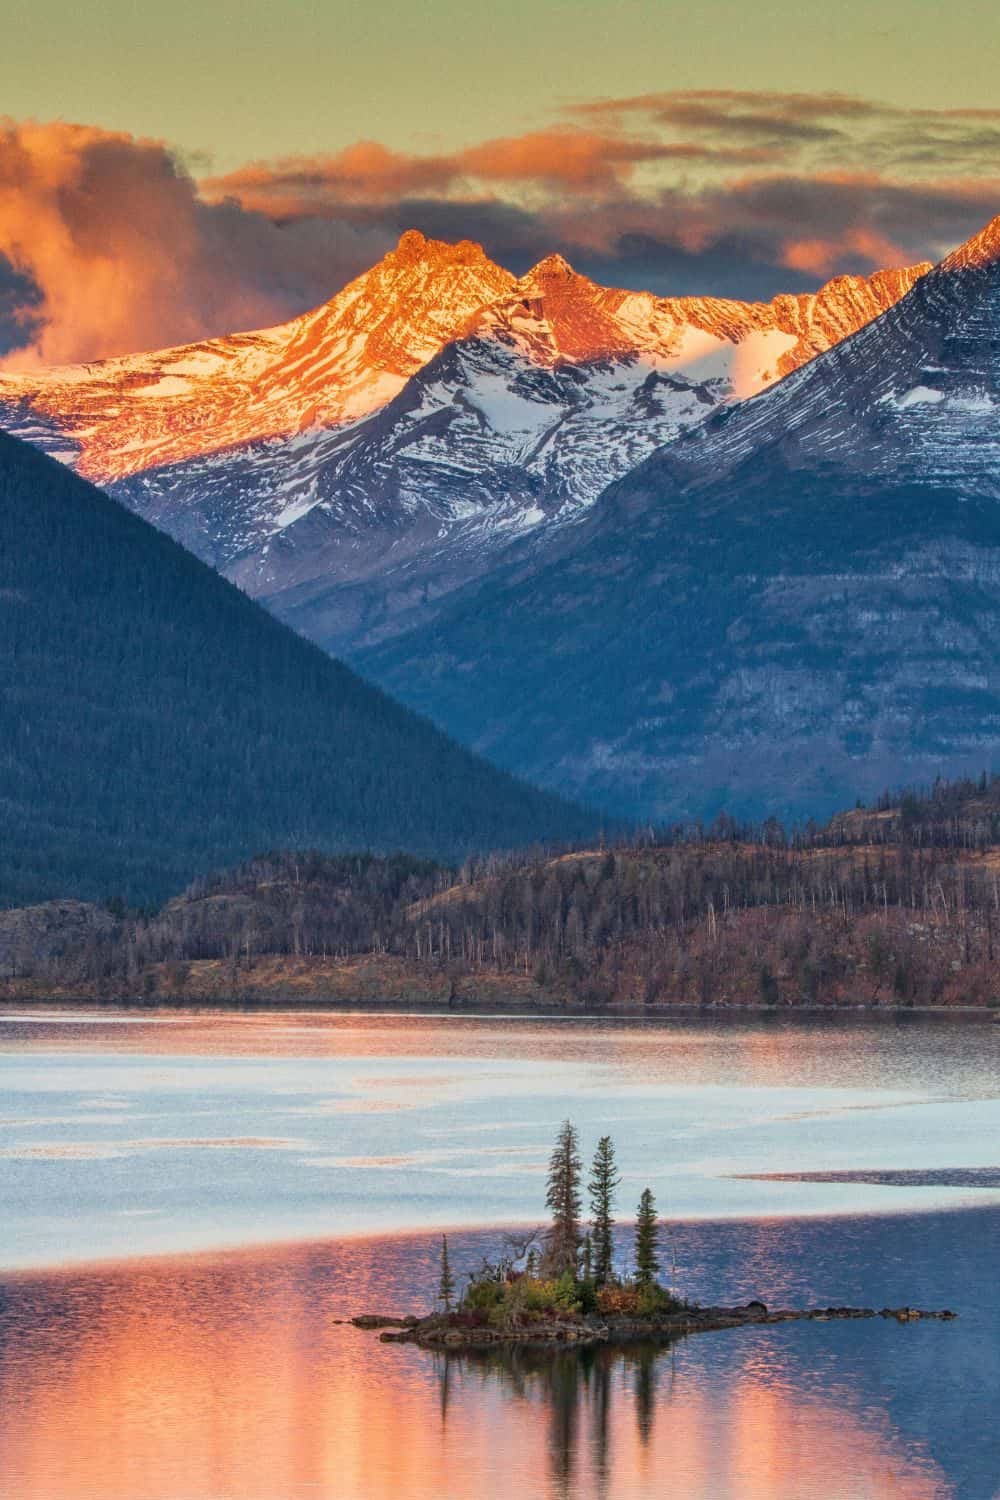
Wild Goose Island Lookout / Best Photography Locations in Glacier National Park
INTREPID’S PRO TIPS:
- To make the most of your photography at Wild Goose Island Lookout, plan your visit during the golden hours of sunrise or sunset. The soft, warm light will cast a nice glow over the landscape, emphasizing the contours and enhancing the overall mood of the scene.
- The calm waters of St. Mary Lake often provide mirror-like reflections, creating a sense of serenity and doubling the visual impact of the scenery.
- Utilize a wide-angle lens to encompass the grandeur of the surrounding peaks, showcasing the vastness and scale of the landscape.
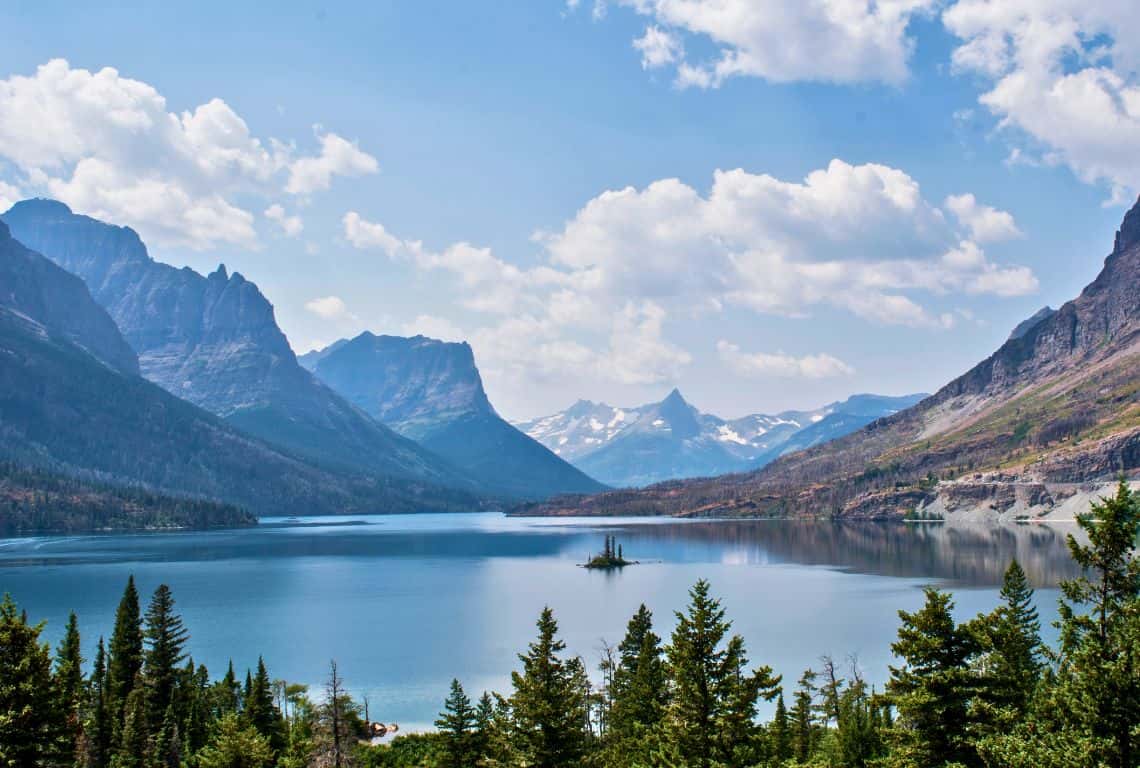
Wild Goose Island Lookout / Best Photography Locations in Glacier National Park
- Incorporate leading lines, such as the winding shoreline to guide the viewer’s gaze toward the focal point of Wild Goose Island.
- Alternatively, use a telephoto lens to isolate the island and highlight its solitary presence against the backdrop of the mountains.
- While framing your shot, pay attention to the rule of thirds, placing key elements along the intersecting lines or at their intersections to create a balanced and visually pleasing composition.
- Consider incorporating foreground elements, such as wildflowers, rocks, or trees, to add depth and visual interest to your photographs, drawing the viewer into the frame.
GOOD TO KNOW:
- Wild Goose Island Lookout is located on the Going-to-the-Sun Road (mile marker 43 – going from west to east) in the St. Mary Valley Region of Glacier National Park.
Grinnell Glacier Viewpoint - Best Photo Location to Capture Glacial Grandeur
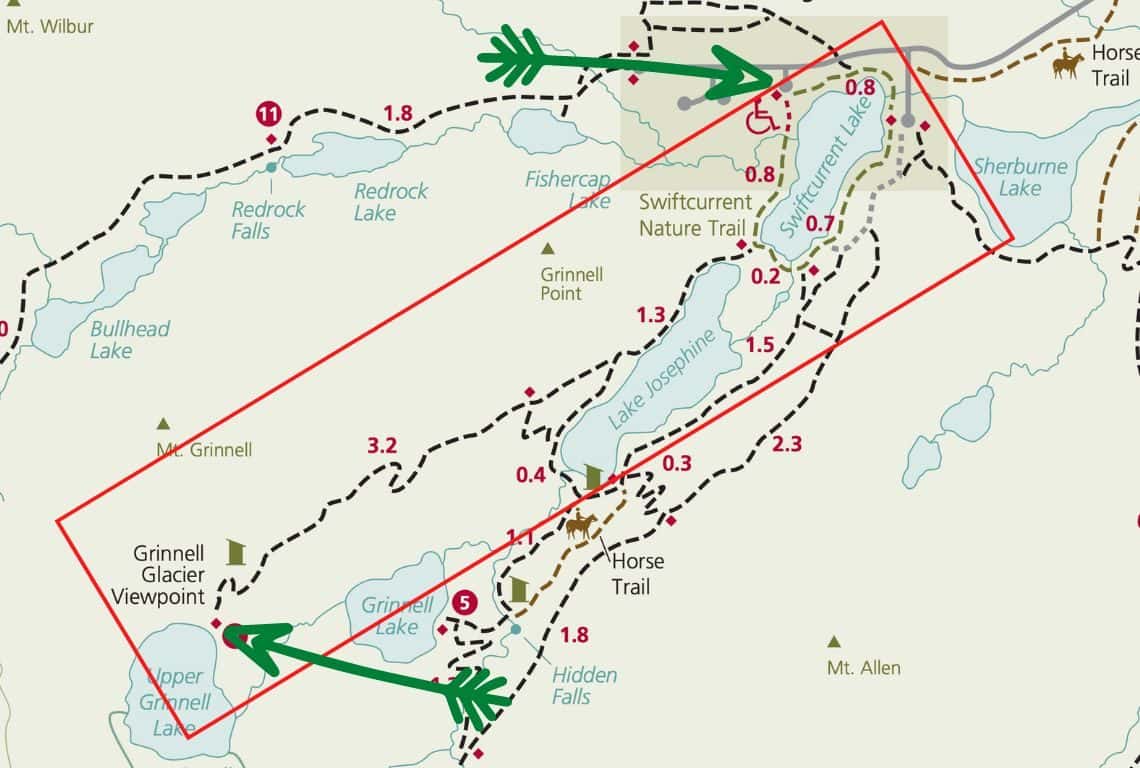
Grinnell Glacier Viewpoint Trail Map / Image Credit: NPS / Best Photography Locations in Glacier National Park
High above the alpine valleys of Glacier National Park, Grinnell Glacier Viewpoint reveals a stunning scene that will transport you to a world of icy wonder.
This iconic spot provides an unparalleled view of the majestic Grinnell Glacier, nestled amidst towering peaks and vibrant alpine meadows.
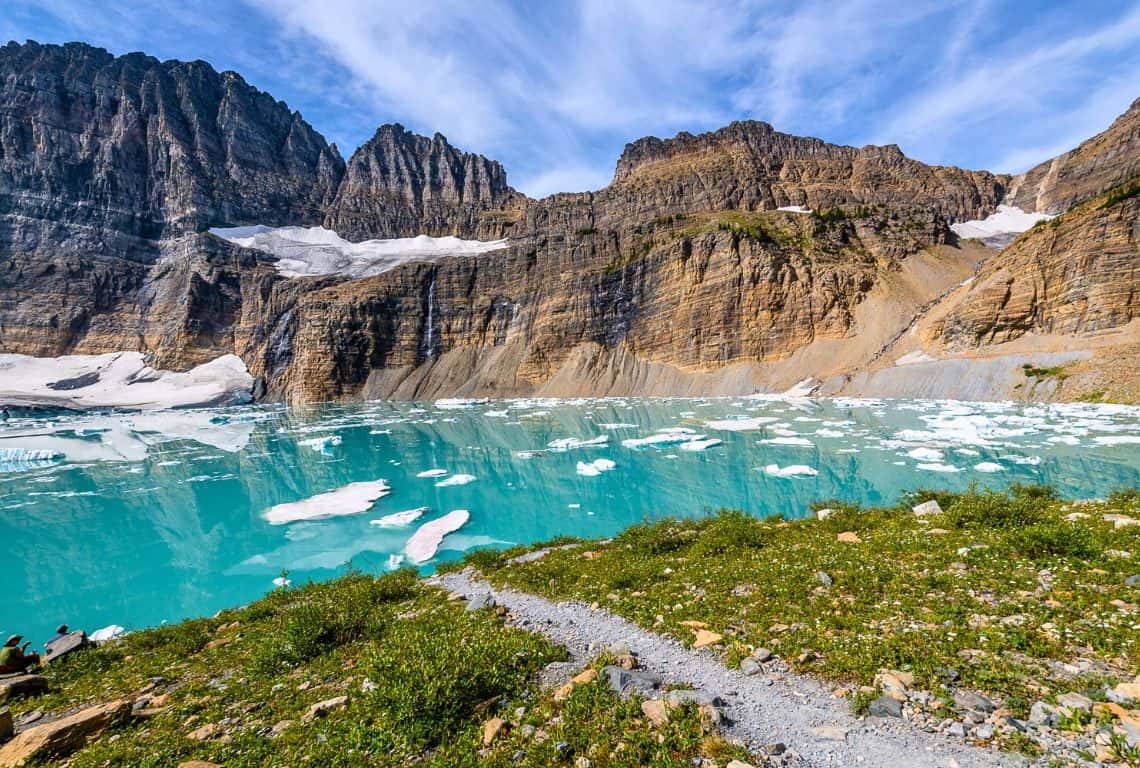
Grinnell Glacier Viewpoint / Best Photography Locations in Glacier National Park
This massive glacier, with its glistening ice and striking blue hues, will grab your attention as it clings to the slopes of the surrounding mountains.
The contrast of the icy expanse against the rugged terrain is visually striking, making it a captivating sight for both the eyes and the camera.
The glacier is named for George Bird Grinnell, an early American conservationist, and explorer, who was also a strong advocate of ensuring the creation of Glacier National Park.
Between 1966 and 2005, Grinnell Glacier lost almost 40 percent of its acreage. Glaciologists have predicted that if carbon dioxide levels increase in a worst-case scenario, all the glaciers in the park, including Grinnell, will disappear by the year 2030.
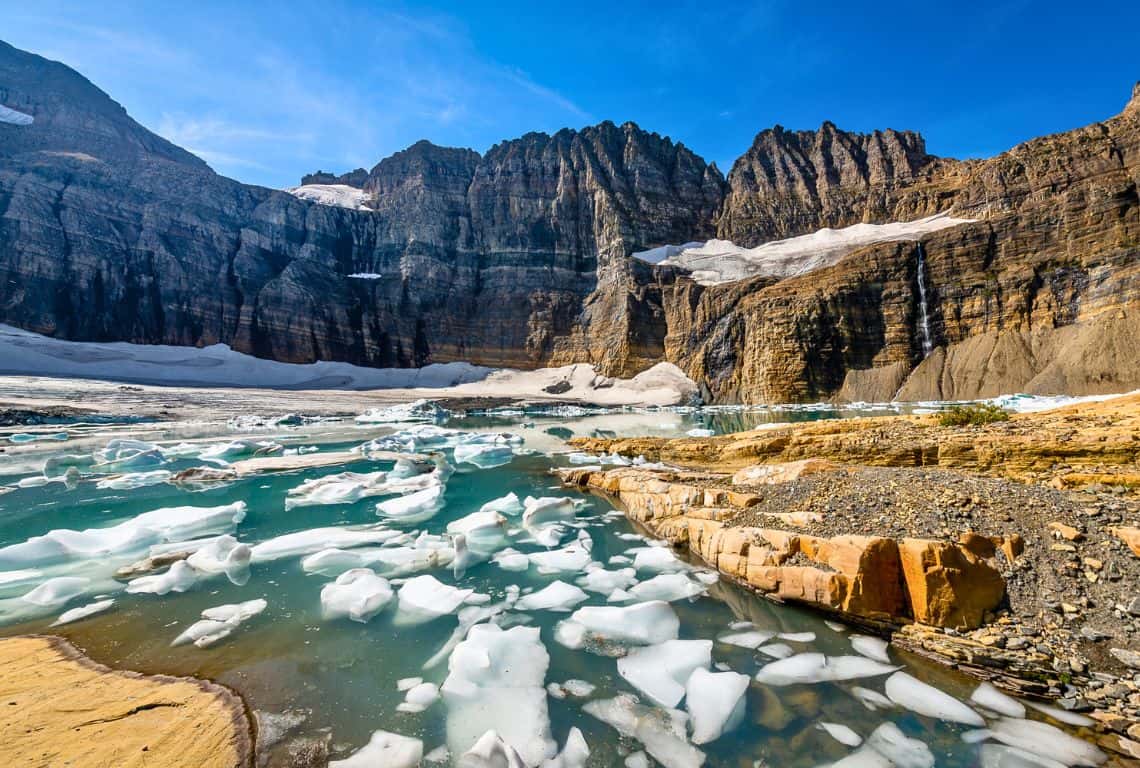
Grinnell Glacier Viewpoint / Best Photography Locations in Glacier National Park
INTREPID’S PRO TIPS:
- Consider using a wide-angle lens to encompass the vastness of the scene and showcase the sweeping beauty of the glacier and the surrounding mountains.
- Alternatively, a telephoto lens can help you zoom in on specific details, highlighting the intricate patterns and textures of the ice or focusing on the jagged peaks that frame the glacier.
- Incorporate foreground elements, such as rocks to create a sense of scale and context.
- Look for leading lines in the landscape that will guide the viewer’s gaze toward the glacier.
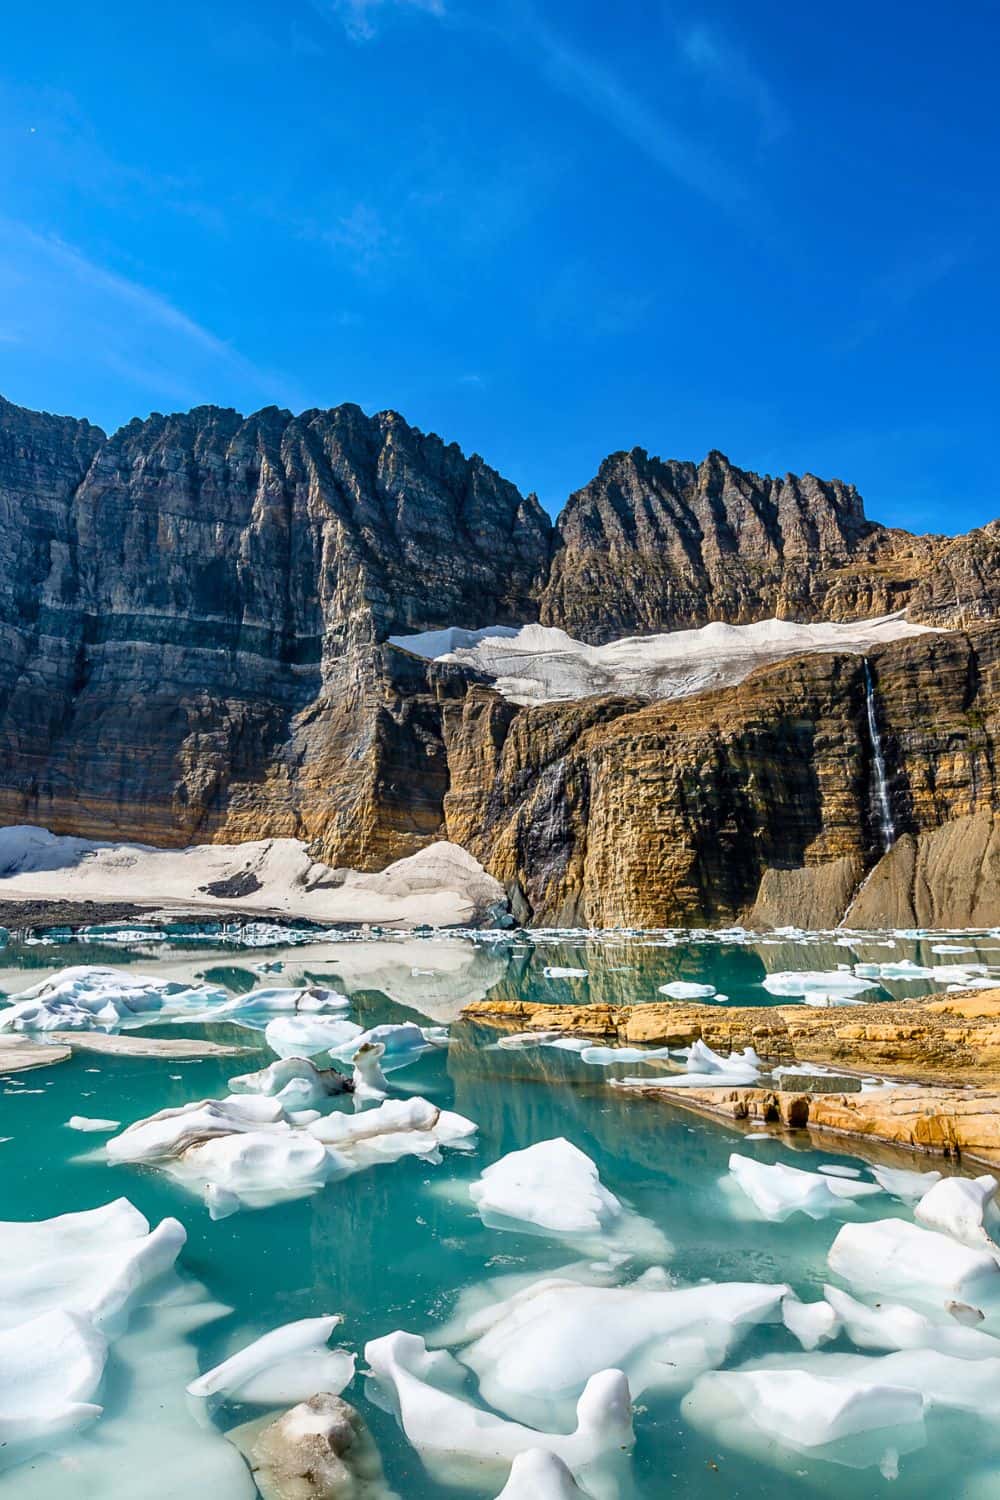
Grinnell Glacier Viewpoint / Best Photography Locations in Glacier National Park
GOOD TO KNOW:
- The trail leading to the viewpoint is 10.6 miles roundtrip, but there is a way to shorten this hike by about 3.4 miles if you take two shuttle boats.
- The first shuttle boat runs across Swiftcurrent Lake (10 min ride) and then the second one across Lake Josephine (15 min ride).
- All in all, it is a strenuous hike if you decide to hike the entire way and it will test your endurance. However, the views on Grinnell Glacier Trail leading to the viewpoint and then to Grinnell Lake are stunning. Well worth the effort!
Swiftcurrent Lake - Famous Photo Spot for Tranquil Mountain Reflections
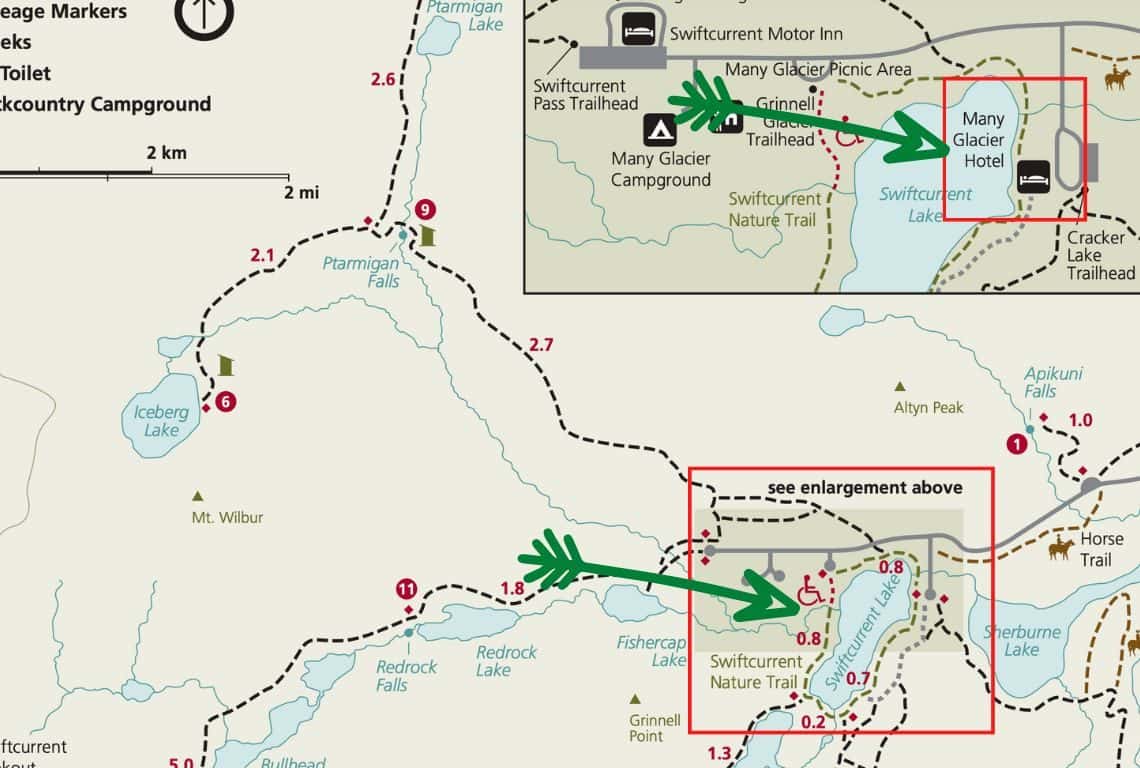
Swiftcurrent Lake / Image Credit: NPS / Best Photography Locations in Glacier National Park
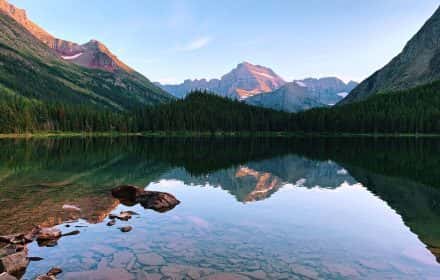
As you arrive at Swiftcurrent Lake, be prepared to witness a scene that feels like it has been plucked from a dream!
The crystal-clear waters perfectly mirror the surrounding landscape, creating a captivating symmetry that is a delight to photograph.
The majestic peaks, such as Mount Grinnell and Mount Wilbur, will provide a breathtaking backdrop, adding a sense of grandeur and drama to your compositions.
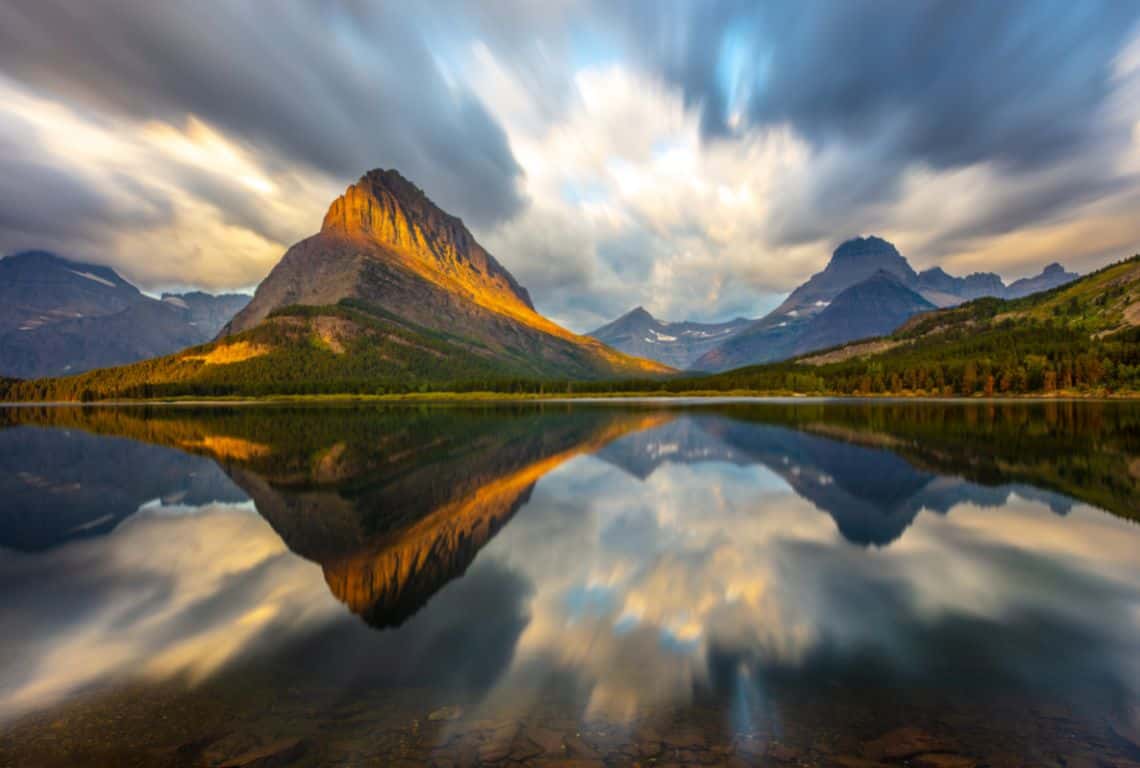
Swiftcurrent Lake at Sunrise / Best Photography Locations in Glacier National Park
INTREPID’S PRO TIPS:
- This spot is great to photograph at sunrise. Since you will be facing west at sunrise, the entire view will be illuminated in the morning sun. If there are a few clouds, then it is for the better.
- However, it is not a bad spot to photograph at sunset either. And, if there are a few clouds in the forecast for the evening, then you will be able to catch an awesome sunset.
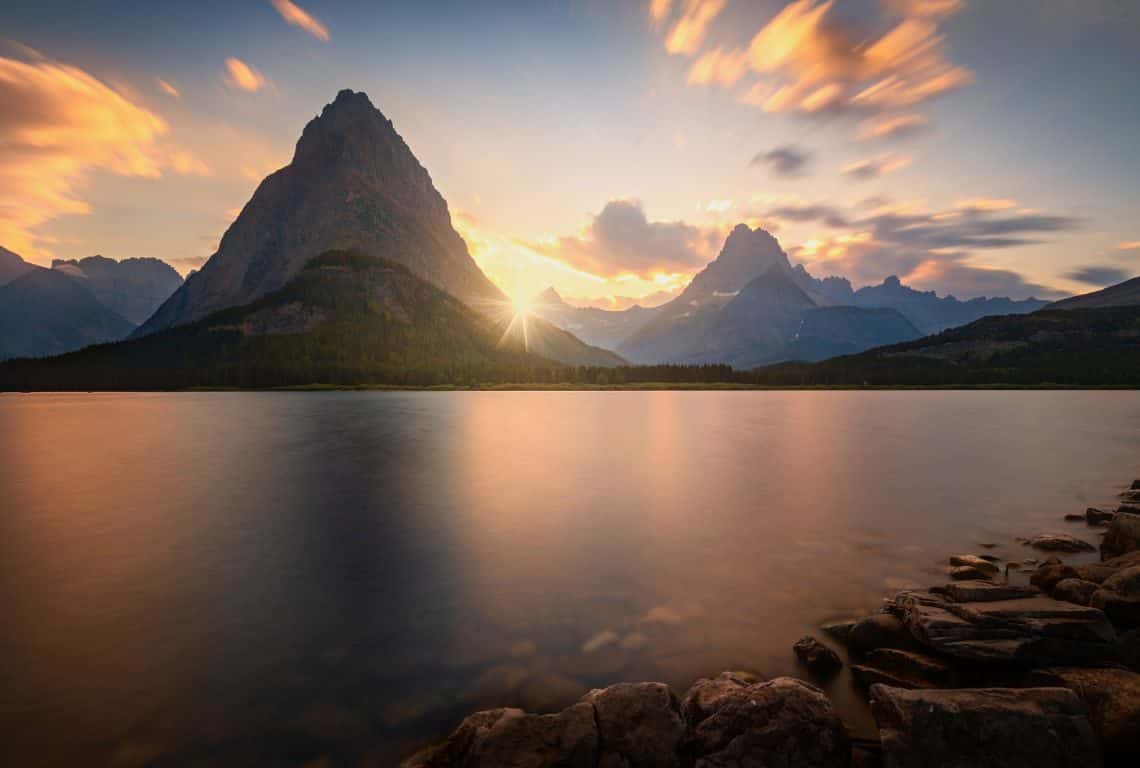
Swiftcurrent Lake at Sunset / Best Photography Locations in Glacier National Park
- A wide-angle lens can help you encompass the grandeur of the surrounding peaks, showcasing the vastness and scale of the landscape.
- Consider utilizing leading lines in your compositions to guide the viewer’s gaze and create a sense of movement. The shoreline, fallen logs, or the curves of the lake itself can serve as excellent leading lines that draw attention to the focal point of your photograph.
- Do not hesitate to explore the lake from different angles and viewpoints. Take a walk along the shoreline, venture out on a boat, or hike to elevated vantage points for unique perspectives.
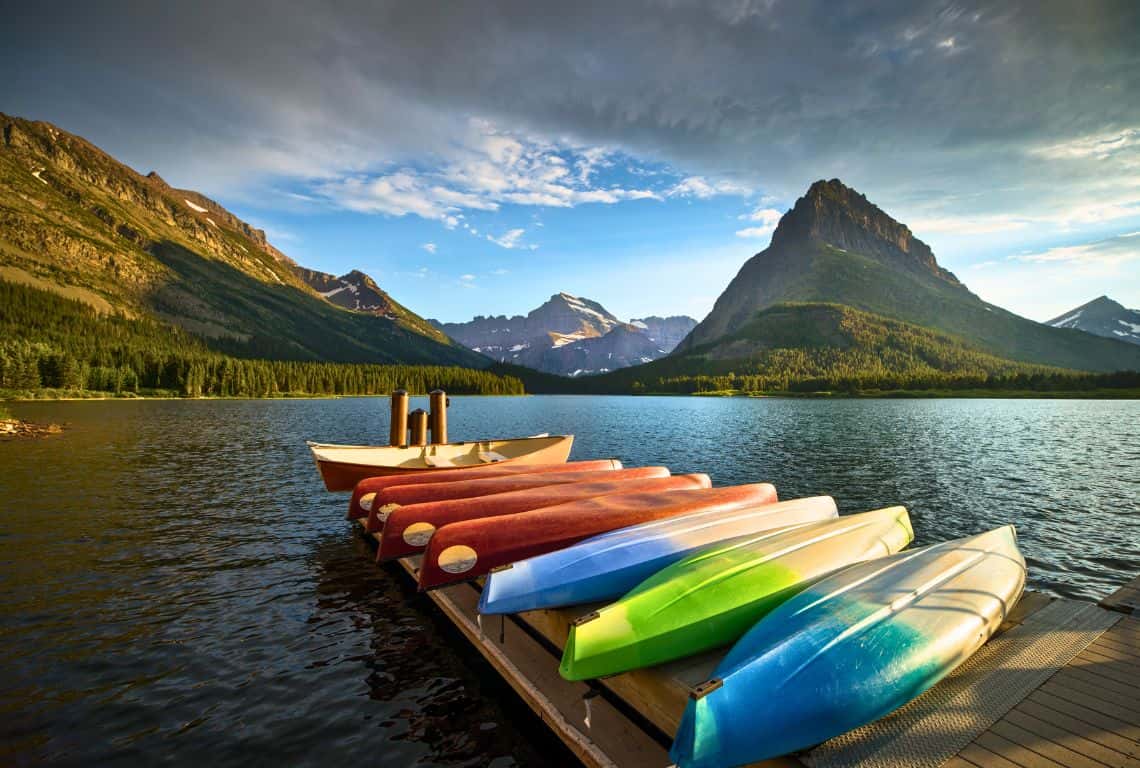
Swiftcurrent Lake at Sunset / Best Photography Locations in Glacier National Park
GOOD TO KNOW:
- The best way to photograph Swiftcurrent Lake is to take an easy Swiftcurrent Lake Nature Trail that goes around the lake. It is only 2.7 miles with almost no elevation change.
- The trailhead is located at the Many Glacier Hotel Boat Dock.
- The trail is a loop and you can do this hike in either direction. My favorite way to hike Swiftcurrent Lake Nature Trail is counterclockwise.
Hidden Lake Overlook - Best Photo Location for Alpine Scenery and Stunning Reflections
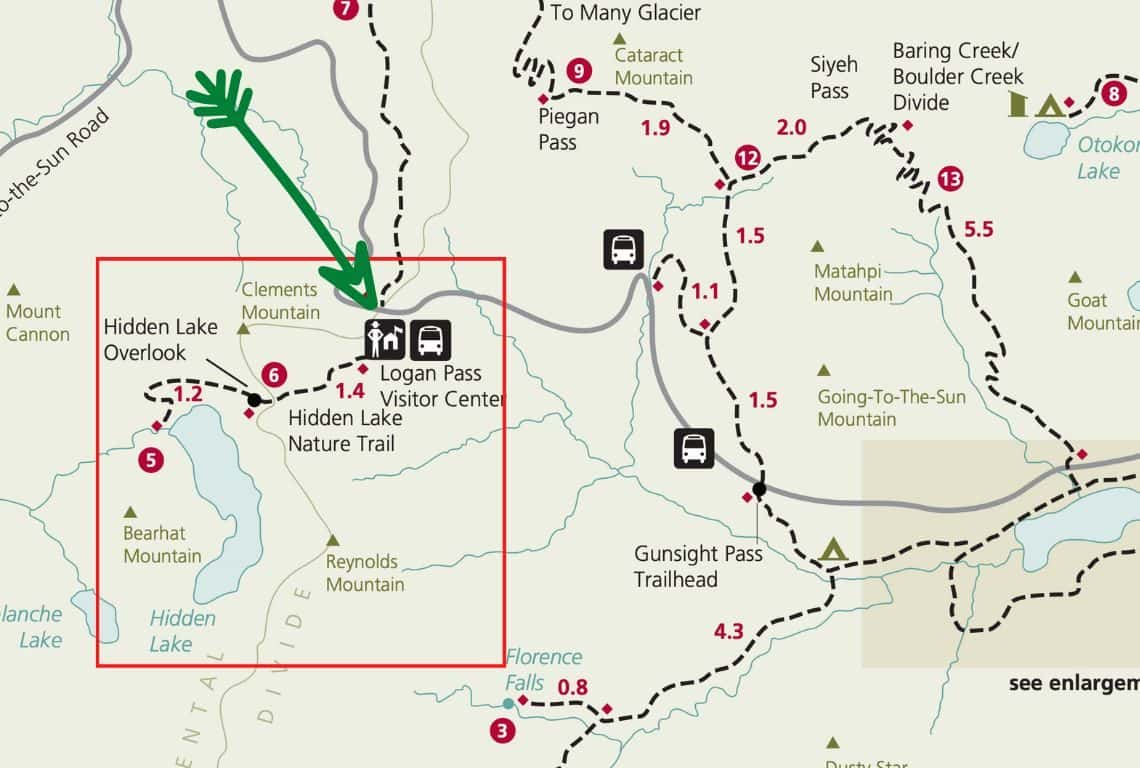
Hidden Lake Overlook Trail Map / Image Credit: NPS / Best Photography Locations in Glacier National Park
In Glacier National Park, Hidden Lake Overlook is a hidden gem with breathtaking vistas and untamed wilderness.
The serene waters of Hidden Lake reflect the surrounding peaks, creating a sense of serenity.
Like Bearhat Mountain, towering mountains offer a dramatic backdrop, adding majesty to the view.
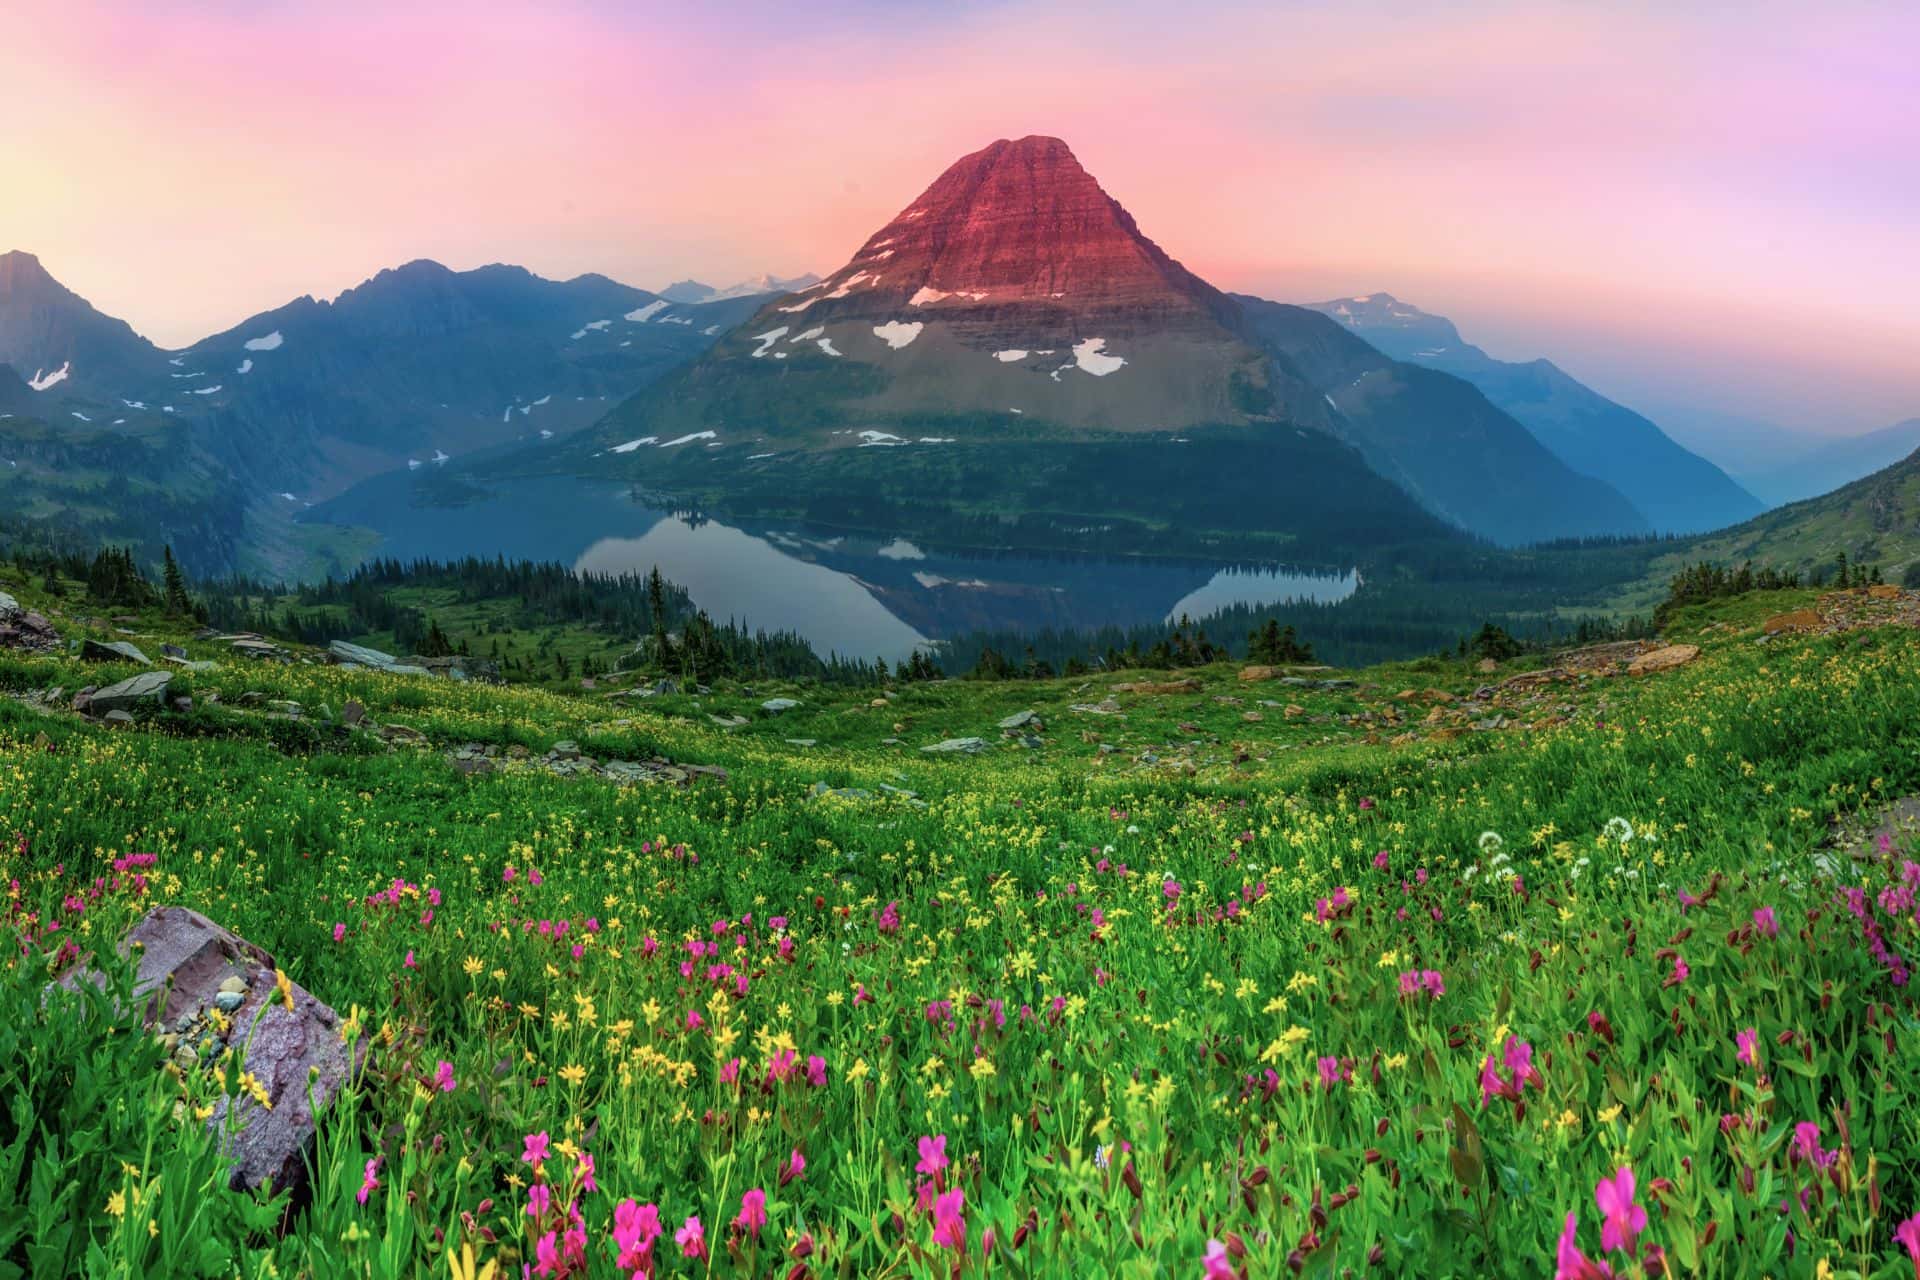
Hidden Lake at Sunrise / Best Photography Locations in Glacier National Park
INTREPID’S PRO TIPS:
- To capture the essence of Hidden Lake Overlook, consider planning your visit during the sunrise or sunset. The light is the best during these times.
- However, because the overlook faces southwest it is easy to photograph at any time of the day.
- My favorite time to photograph Hidden Lake is at sunset. Just a word of caution: give yourself plenty of time to get back so that you are not hiking back in the darkness. It takes about 30-40 minutes to hike back to the trailhead. Make sure to bring a headlamp or a flashlight. Also, dress in layers. It gets cold super fast after the sunset.
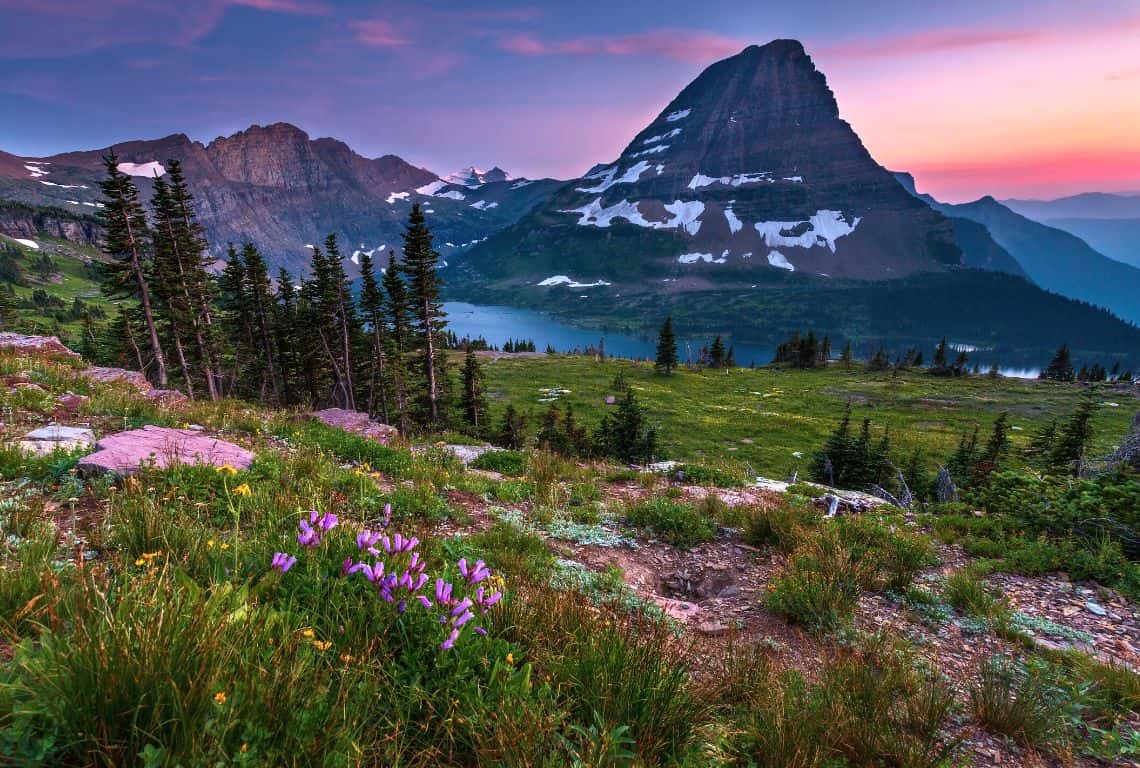
Hidden Lake Overlook / Best Photography Locations in Glacier National Park
- As you explore Hidden Lake Overlook, be prepared to see some wildlife. From mountain goats to marmots and various bird species, the presence of wildlife will add an element of storytelling to your photographs!
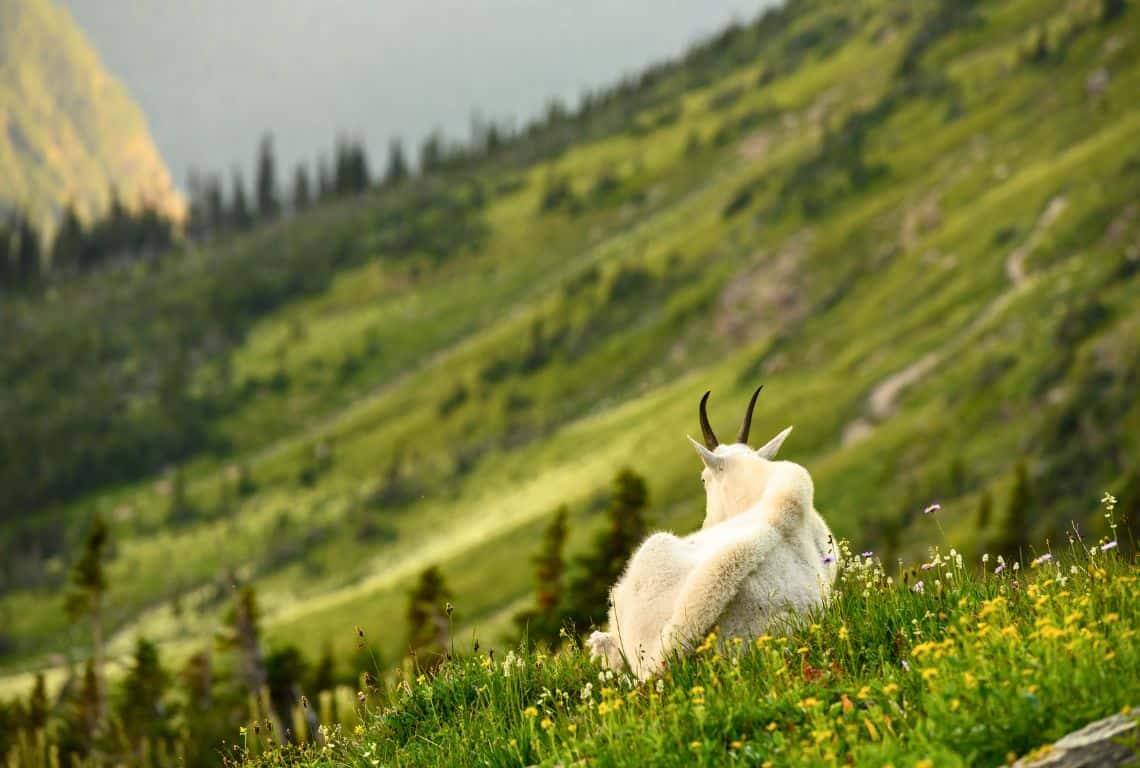
Mountain Goat Along Hidden Lake Trail / Best Photography Locations in Glacier National Park
GOOD TO KNOW:
- To get to Hidden Lake Overlook, you will have to do some hiking. However, it is an easy/moderate hike (2.8 miles roundtrip).
- Hidden Lake Trailhead is located at Logan Pass on the Going-to-the-Sun Road.
- The trail will take you through some beautiful alpine meadows with plenty of photo opportunities. I am sure you will get to see mountain goats or bighorn sheep along the way.
Cracker Lake - Famous Photo Spot for Turquoise Waters and Majestic Mountain Backdrop
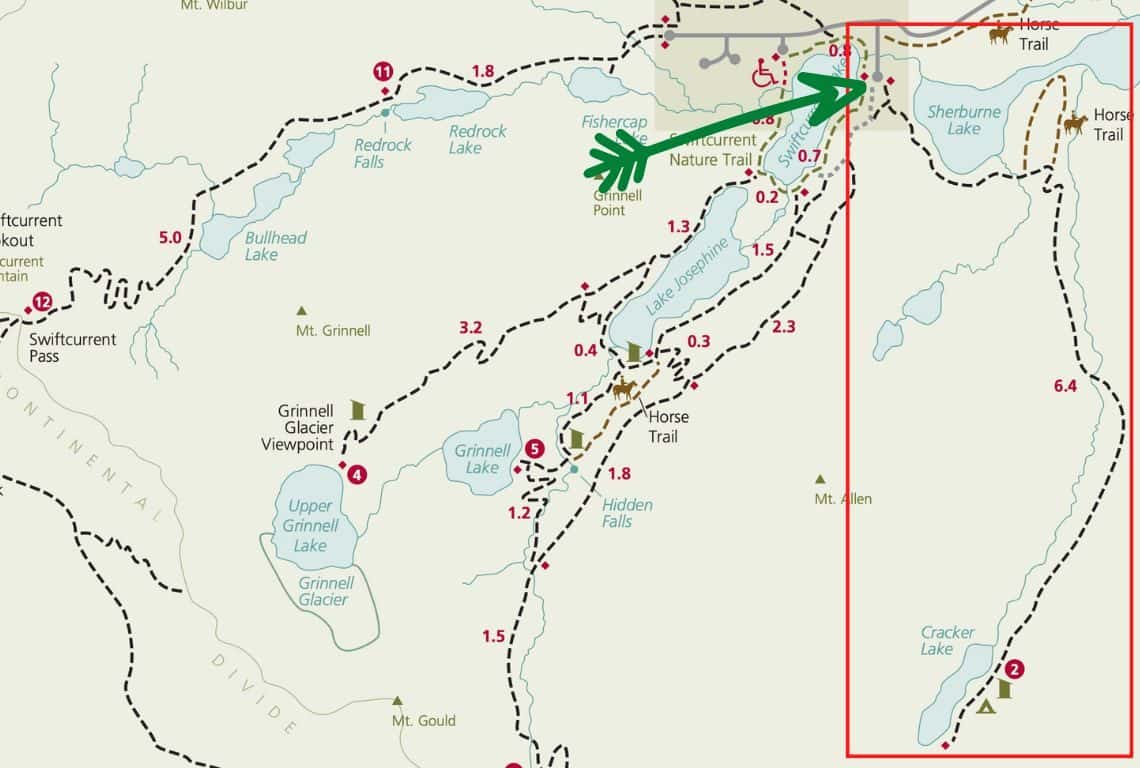
Cracker Lake Trail Map/ Image Credit: NPS / Best Photography Locations in Glacier National Park
Cracker Lake is a visual spectacle with vibrant turquoise waters, framed by towering cliffs and majestic peaks.
Located at the head of a canyon, it is surrounded to the south by Mount Siyeh, rising more than 4,000 feet above, Cracker Peak to the southeast, and Allen Mountain to the north.
Nature’s artistry is on full display at Cracker Lake, captivating with its surreal azure hue. The striking color comes from glacial flour, a fine sediment in the water that refracts sunlight, creating a mesmerizing turquoise glow.
This natural phenomenon sets the stage for breathtaking photography, where the vivid waters contrast against the rugged surroundings.
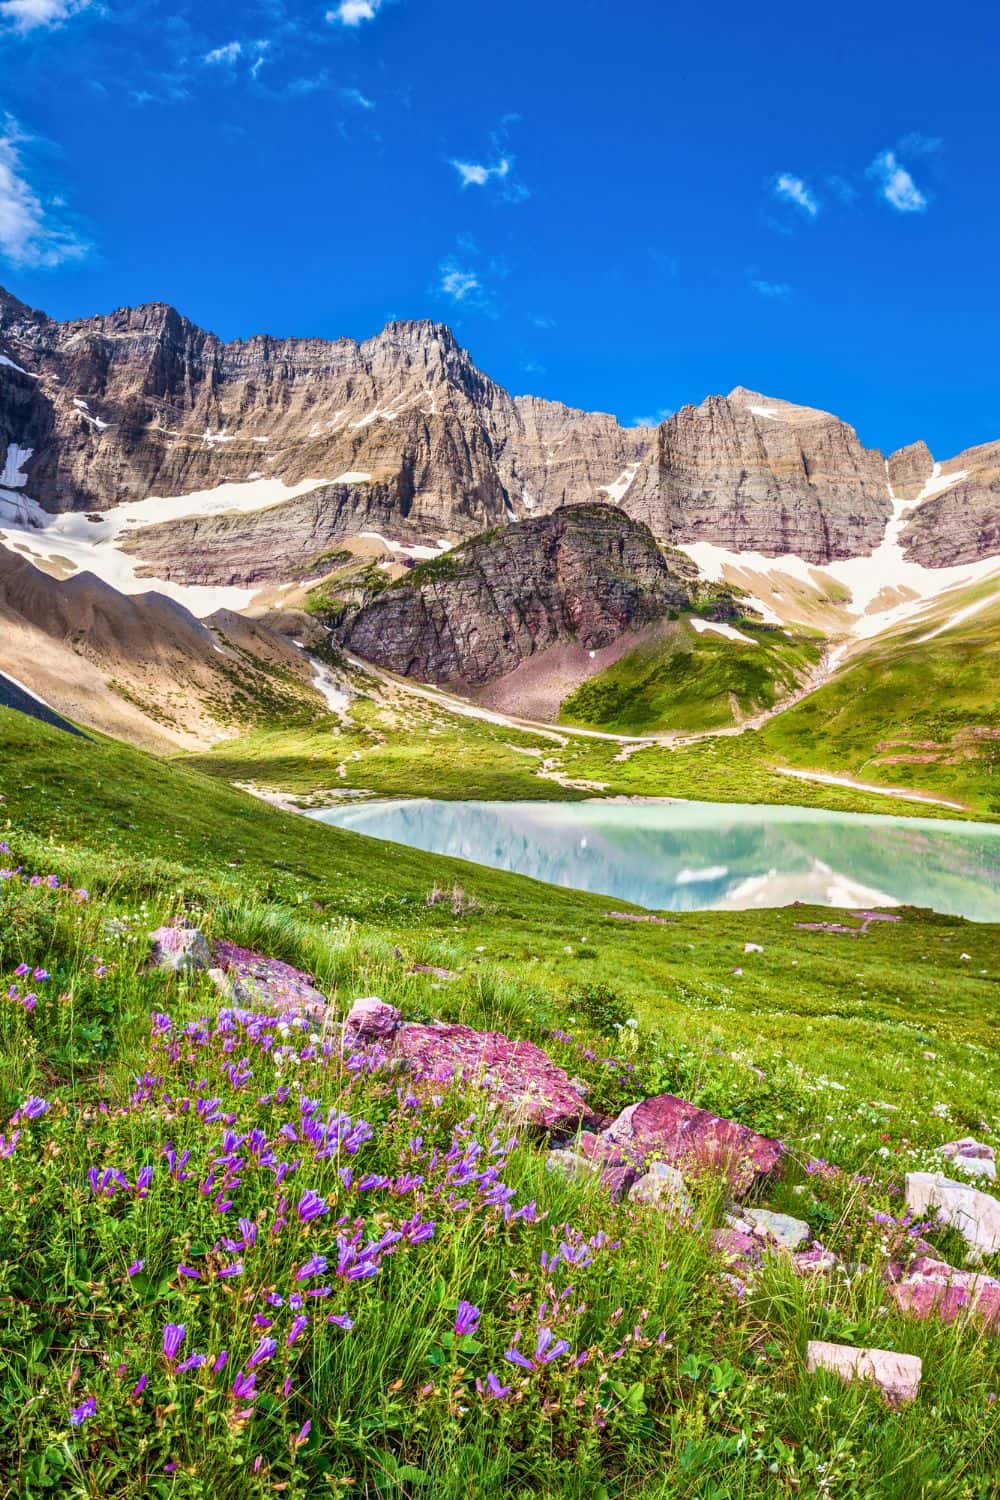
Cracker Lake / Best Photography Locations in Glacier National Park
INTREPID’S PRO TIPS:
- The best time to photograph Cracker Lake is during a bright sunny day. The sun will intensify the vibrant color of the lake, enhancing its ethereal beauty.
- Utilize a wide-angle lens to encompass the expansive beauty of Cracker Lake. This lens choice allows you to capture the vastness of the scene, emphasizing the grandeur of the surrounding cliffs and peaks.
- Consider incorporating leading lines in your compositions to guide the viewer’s gaze and create a sense of depth. For example, the curving shoreline or the jagged cliffs can serve as natural leading lines, drawing attention to the focal point of the lake.
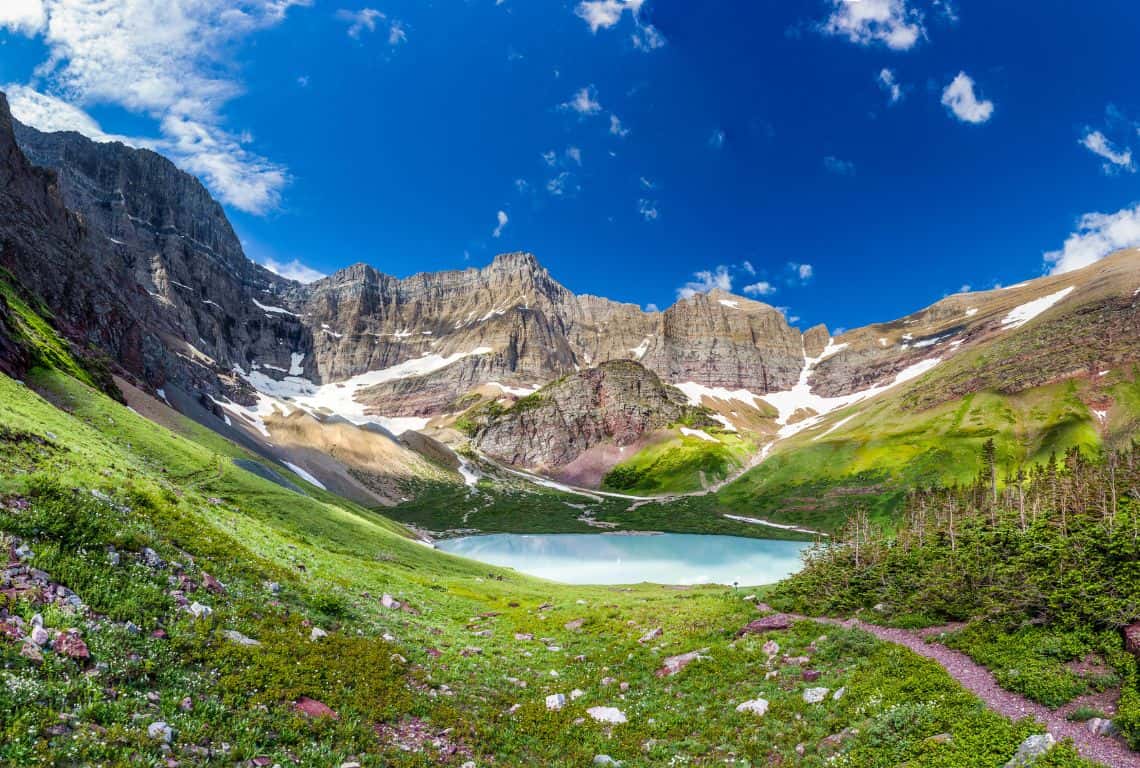
Cracker Lake / Best Photography Locations in Glacier National Park
GOOD TO KNOW:
- Cracker Lake is located at the end of Craker Lake Trail. It is a long (12.8 miles roundtrip) and challenging (1,400 elevation change) hike. Ensure you have the appropriate gear, ample water, and proper hiking equipment. Take breaks along the way to admire the surroundings and scout for potential photography spots.
- Craker Lake Trailhead is at the south end of the parking lot above the Many Glacier Hotel. Right from the start, you will get to enjoy awesome views of Lake Sherburne.
Iceberg Lake
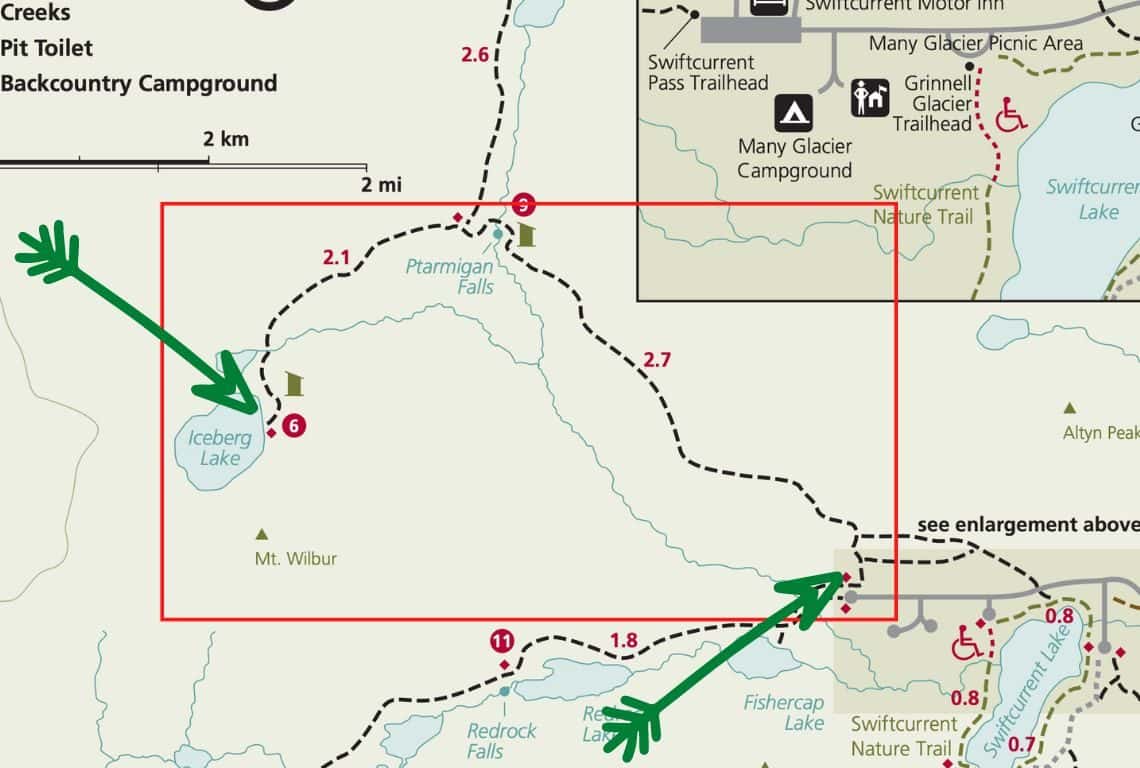
Iceberg Lake Trail Map/ Image Credit: NPS / Best Photography Locations in Glacier National Park
Iceberg Lake sits at an elevation of 6,094 feet. Mt. Wilbur surrounds it to the south and Continental Divide to the west. This hidden gem will offer you a chance to capture the ethereal beauty of a glacial lake, framed by towering peaks and floating ice sculptures.
The shimmering waters, fed by surrounding glaciers, reflect the pristine blue of the sky and the rugged beauty of the surrounding peaks.
True to its name, the lake often hosts floating icebergs, adding a touch of drama and mystique to the scene.
The color of the water ranges from turquoise to aquamarine depending on the time of the day and the amount of sunlight.
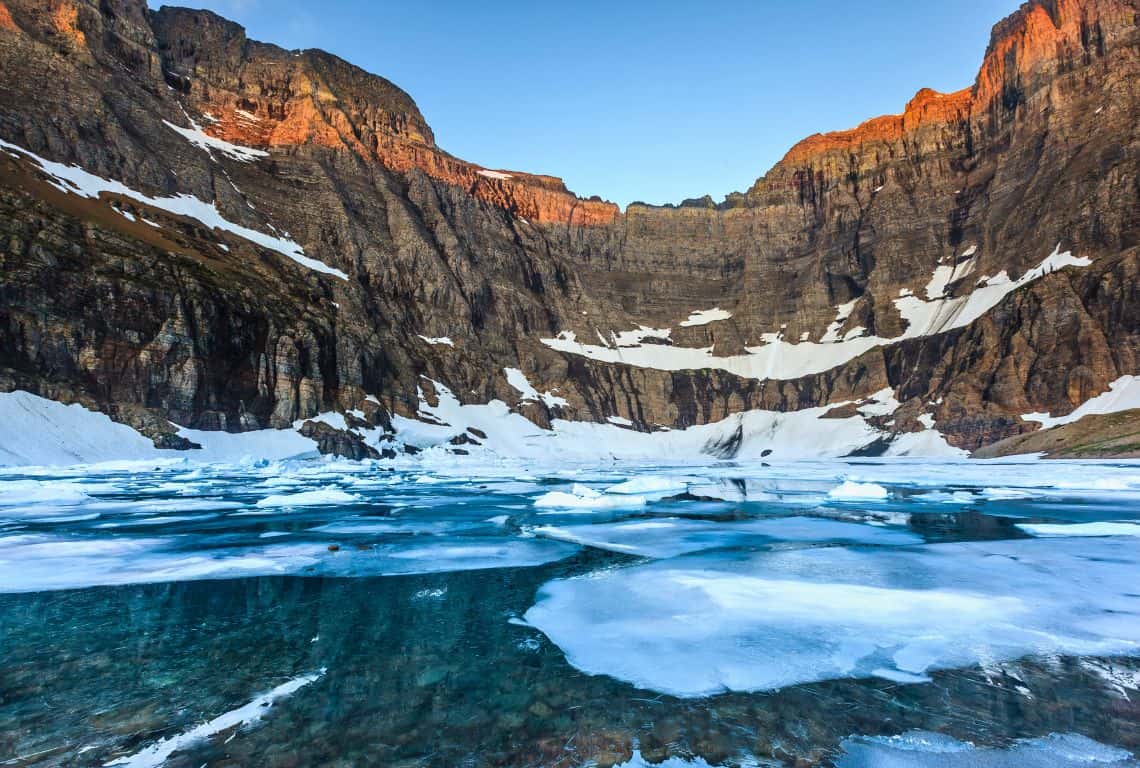
Iceberg Lake / Best Photography Locations in Glacier National Park
INTREPID’S PRO TIPS:
- The best time to photograph Iceberg Lake is during a bright sunny day. The bright light will enhance the color of the lake.
- Experiment with different compositions and angles to showcase the interplay between the icy water, floating ice formations, and the majestic mountains that encircle the lake.
- Capture the beauty of the floating icebergs by focusing on their intricate details and textures. Zoom in with a telephoto lens to isolate individual ice formations, revealing their unique shapes and patterns.
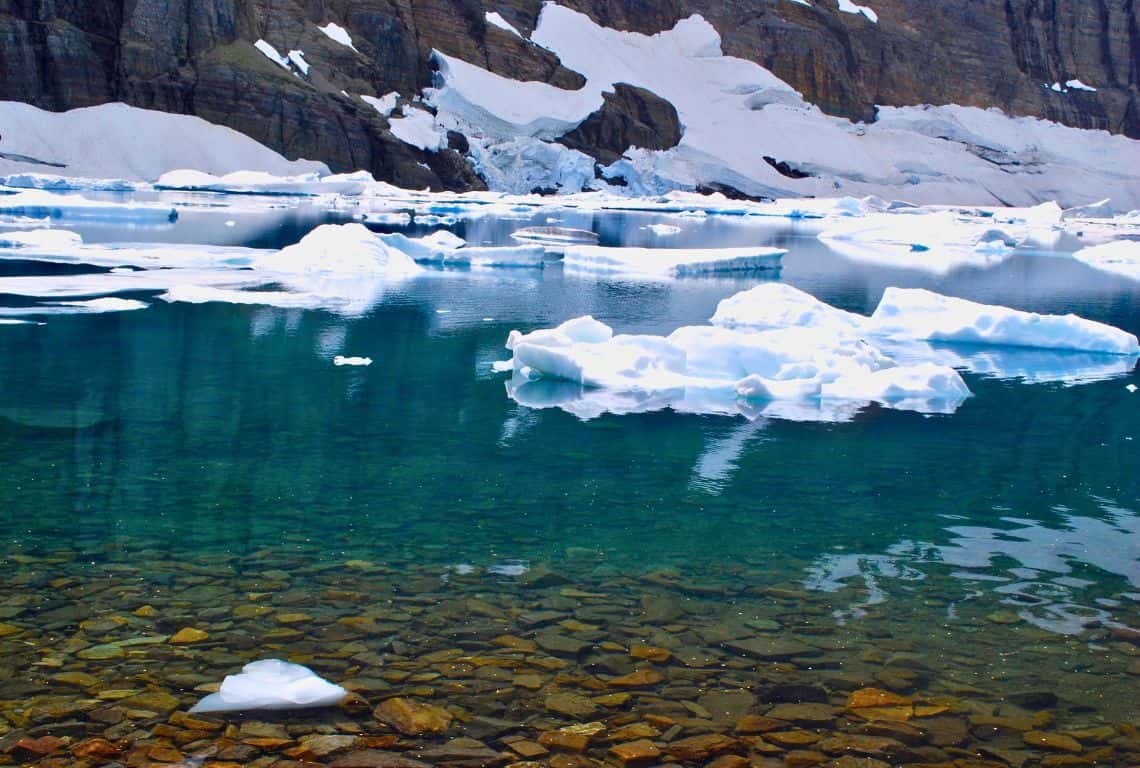
Iceberg Lake / Best Photography Locations in Glacier National Park
GOOD TO KNOW:
- Iceberg Lake is located at the end of Iceberg Lake Trail.
- Iceberg Lake Trailhead is right behind the Swiftcurrent Motor Inn in the Many Glacier Region of Glacier National Park.
- This trail is long and strenuous (9.6 miles roundtrip, 1,275 feet elevation change).
Ptarmigan Tunnel - Iconic Rocky Mountain Passage that Leads to Panoramic Vistas
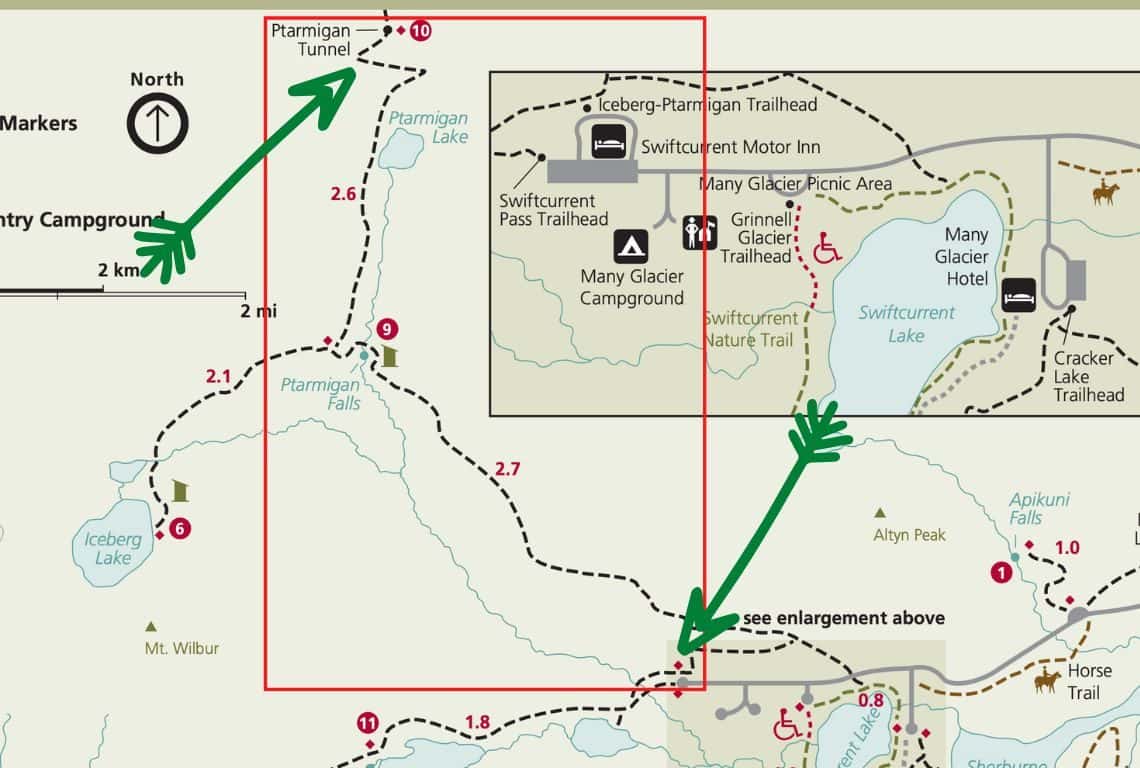
Ptarmigan Tunnel Trail Map/ Image Credit: NPS / Best Photography Locations in Glacier National Park
I think that Ptarmigan Tunnel and Ptarmigan Trail leading to it are visually striking locations making it a photographer’s dream come true!
The views along the way of Ptarmigan Lake and the valley below with Mt. Wilbur towering over it all are spectacular.
However, the highlight of this hike is reaching and then going through a 240-foot tunnel that runs through the Ptarmigan Wall.
The tunnel was built in the early 1930s and allows hikers to traverse through the mountainside, emerging on the other side to witness the breathtaking beauty of the Ptarmigan Wall and surrounding alpine landscapes.
The tunnel itself provides a fascinating subject for photography, with its stone construction.
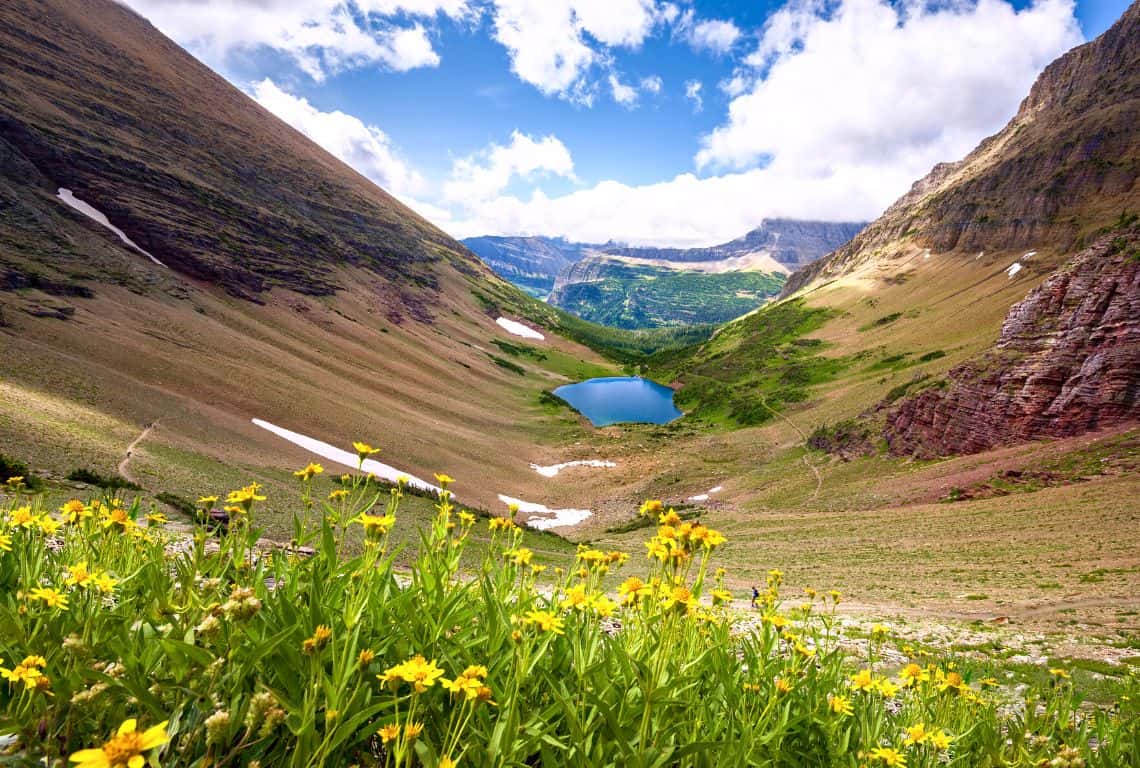
Ptarmigan Lake / Best Photography Locations in Glacier National Park
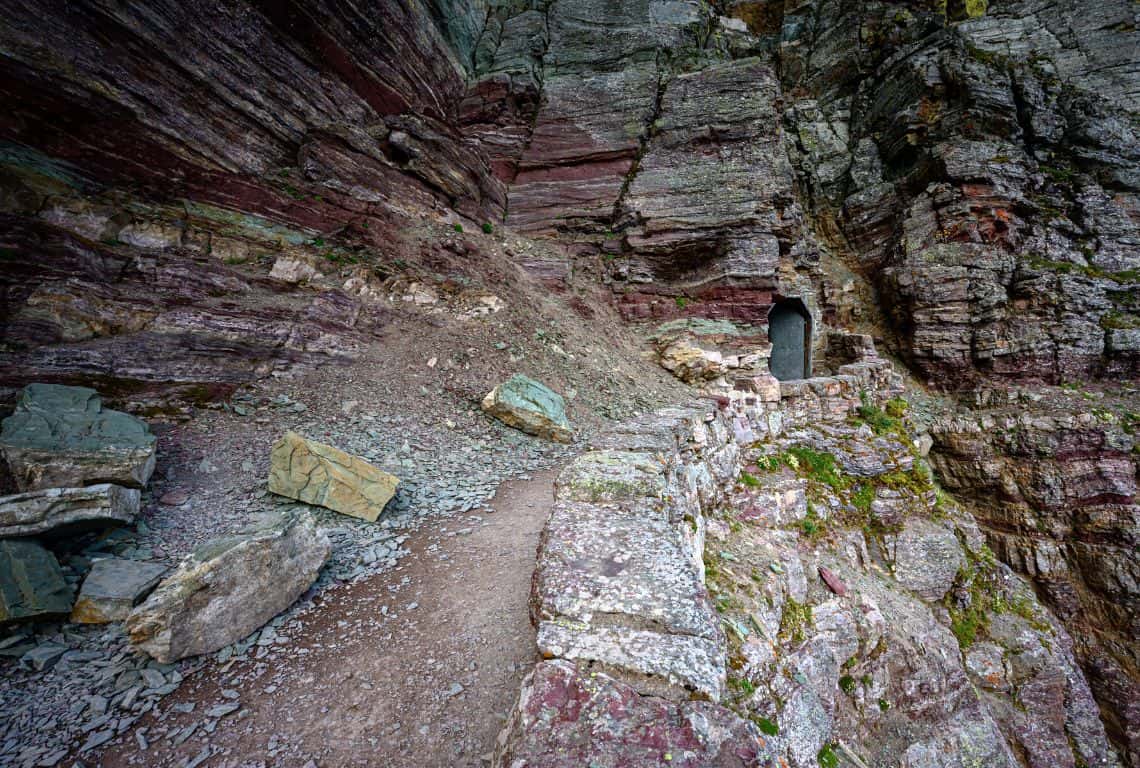
Ptarmigan Tunnel / Best Photography Locations in Glacier National Park
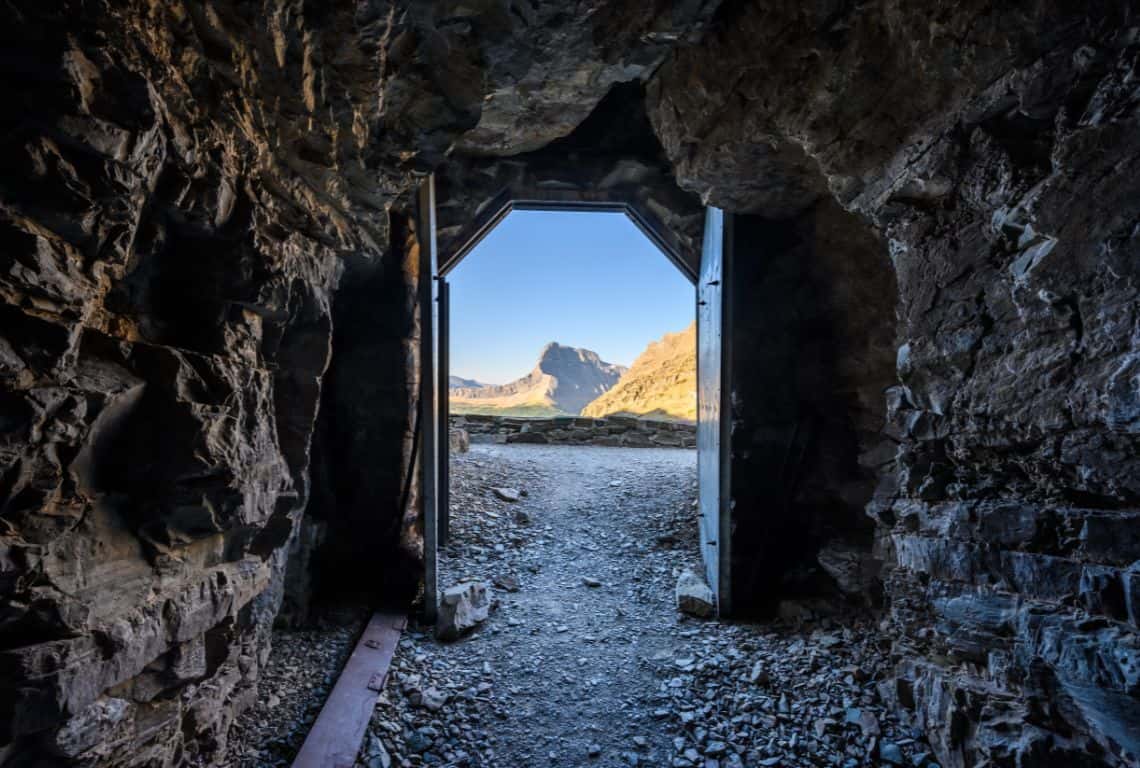
Ptarmigan Tunnel / Best Photography Locations in Glacier National Park
INTREPID’S PRO TIPS:
- To capture the essence of the Ptarmigan Tunnel, consider visiting when there is plenty of sunlight and when natural light illuminates the scene. The tunnel’s entrance and exit points create intriguing frames, that will draw the viewer’s attention into the depths of the tunnel or towards the majestic views beyond.
- Once through the tunnel, you will be rewarded with spectacular vistas of the Ptarmigan Wall and the surrounding alpine landscapes. Be prepared to capture the grandeur of this majestic scenery. Utilize a wide-angle lens to encompass the expansive beauty of the landscape, emphasizing the towering peaks, glaciers, and rugged terrain that unfold before you.
GOOD TO KNOW:
- Ptarmigan Tunnel Trailhead is located behind the Swiftcurrent Motor Inn in the Many Glacier Valley Region of Glacier Nationa Park.
- The trail is 10.6 miles long roundtrip with an elevation change of 2,300 feet. Needless to say, it is a strenuous hike that will test your endurance. Ensure you have proper gear before embarking on this trail.
Intrepid Scout's Tips on Best Photography Locations in Glacier National Park
Glacier National Park is a photographer’s paradise, offering a diverse range of stunning landscapes and captivating natural wonders. To make the most of your photography adventures in Glacier, keep the following tips in mind:
- Be Prepared: Glacier National Park’s rugged terrain and changing weather conditions require adequate preparation. Carry essential gear such as a sturdy tripod, extra batteries, memory cards, lens cleaning tools, and appropriate clothing and footwear for varying conditions.
- Be Aware And Be Safe: Make sure to have bear spray handy (not in your backpack!). Keep your distance from wildlife.
- Composition Matters: Pay attention to the composition of your shots. Incorporate leading lines, foreground elements, and interesting perspectives to create depth and guide the viewer’s gaze through the frame. Experiment with different angles and viewpoints to bring a fresh perspective to well-known locations.
- Utilize Wide-angle and Telephoto Lenses: A wide-angle lens is ideal for capturing expansive landscapes and showcasing the grandeur of Glacier’s mountains and lakes. A telephoto lens can help you isolate details, such as wildlife or intricate patterns, adding an element of intimacy to your photographs.
- Capture Motion and Reflections: Experiment with long exposures to capture the movement of waterfalls, rivers, or clouds, creating a sense of dynamism in your images. Take advantage of the reflective surfaces of Glacier’s lakes to capture stunning mirror-like reflections.
More Helpful Posts About Glacier National Park
9 Essential GLACIER NATIONAL PARK TIPS for First-Time Visitors (Maximize Your Adventure)
8 Fun and EASY HIKES in GLACIER National Park (with Stunning Views)
18 Spectacular Stops on Going-to-the-Sun Road: Explore the Beauty of Glacier National Park
9 Most SCENIC HIKES in GLACIER National Park You Need to Explore (MAPS+TIPS)
14 Perfect PLACES to STAY in GLACIER NATIONAL PARK (Inside, West, and East Side Accommodations)
Don't Have Time To Read it Now?
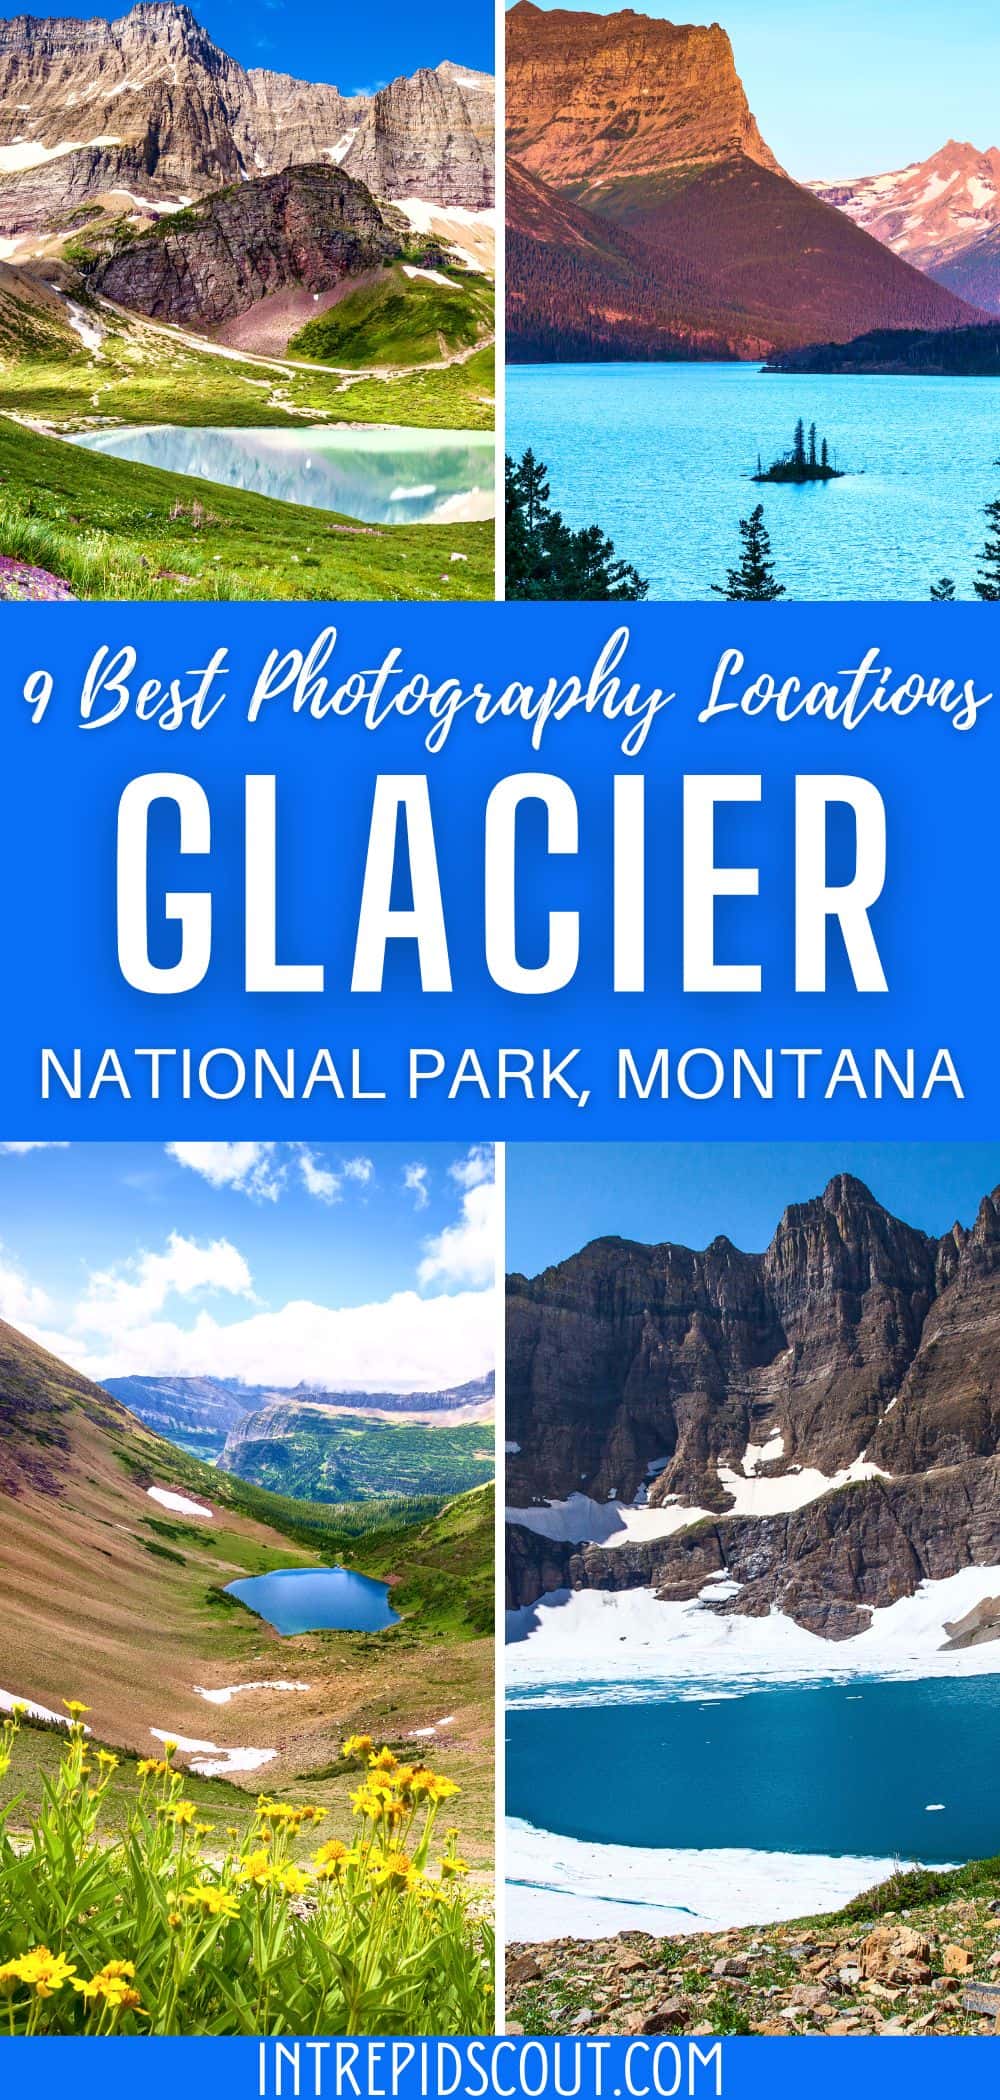
Why Not Save Best Photography Locations in Glacier to Your Pinterest Board!
Now, It Is Your Turn, I Would Like to Hear Back from You!
Are you planning your trip to Glacier National Park?
Please let me know! Drop me a quick comment right below!
Click on any of the images below to get inspired and to help you with the planning process for your trip to Glacier National Park!
